Curly Spider Plant (commonly known as Bonnie) is one of the popular crazes among indoor plants and many know it as the compact variety of plants with curly, swirly leaves.
If you have been planning for the home decor, you should not miss curly spider’s green leaves and white variegations.
You can keep it for its attractive foliage as it does not have flowers and it won’t cost you much effort for monitoring and maintaining a curly spider.
Generally, curly spider plants grow in bright indirect light, moderate watering, temperature between 50° to 80°F and above 40% humidity. Also, they will need well-draining soil, all-purpose fertilizer, repotting once every 1-2 years, and occasional pruning.
You can grow curly spiders indoors or outdoors in pots or beds and if they are placed in the hanging pots, you can get impressive cascade effects.
For your convenience, I have explained everything you need to know when growing curly spider plants at home. So, let’s begin!
Table of Contents
Overview of Curly Spider Plant
The curly spider plant is a bit more compact version with curlier leaves when compared to the plain old spider plant.
According to the NASA Air Study, green spider plants filter out carbon monoxide, formaldehyde, and other harmful impurities and finish removing 90% of the potentially cancer-causing chemical.
The spider plant”Chlorophytum comosum” received the name after explorer Carl Peter Thunberg finished collecting it in 1794.
Here is a table consisting of additional information about the curly spider plant.
Scientific Name | Chlorophytum comosum Bonnie |
Common Names | Curly Spider Plant, Spider Ivy, Ribbon Plant |
Origin | Southern Africa |
Family | Asparagaceae |
Plant Type | Compact variety with curly, swirly leaves |
Growth Zone | USDA Zone 9-11 |
Growth Size | 60 cm to 75 cm tall |
Foliage Type | Traditional green with white stripe variegation |
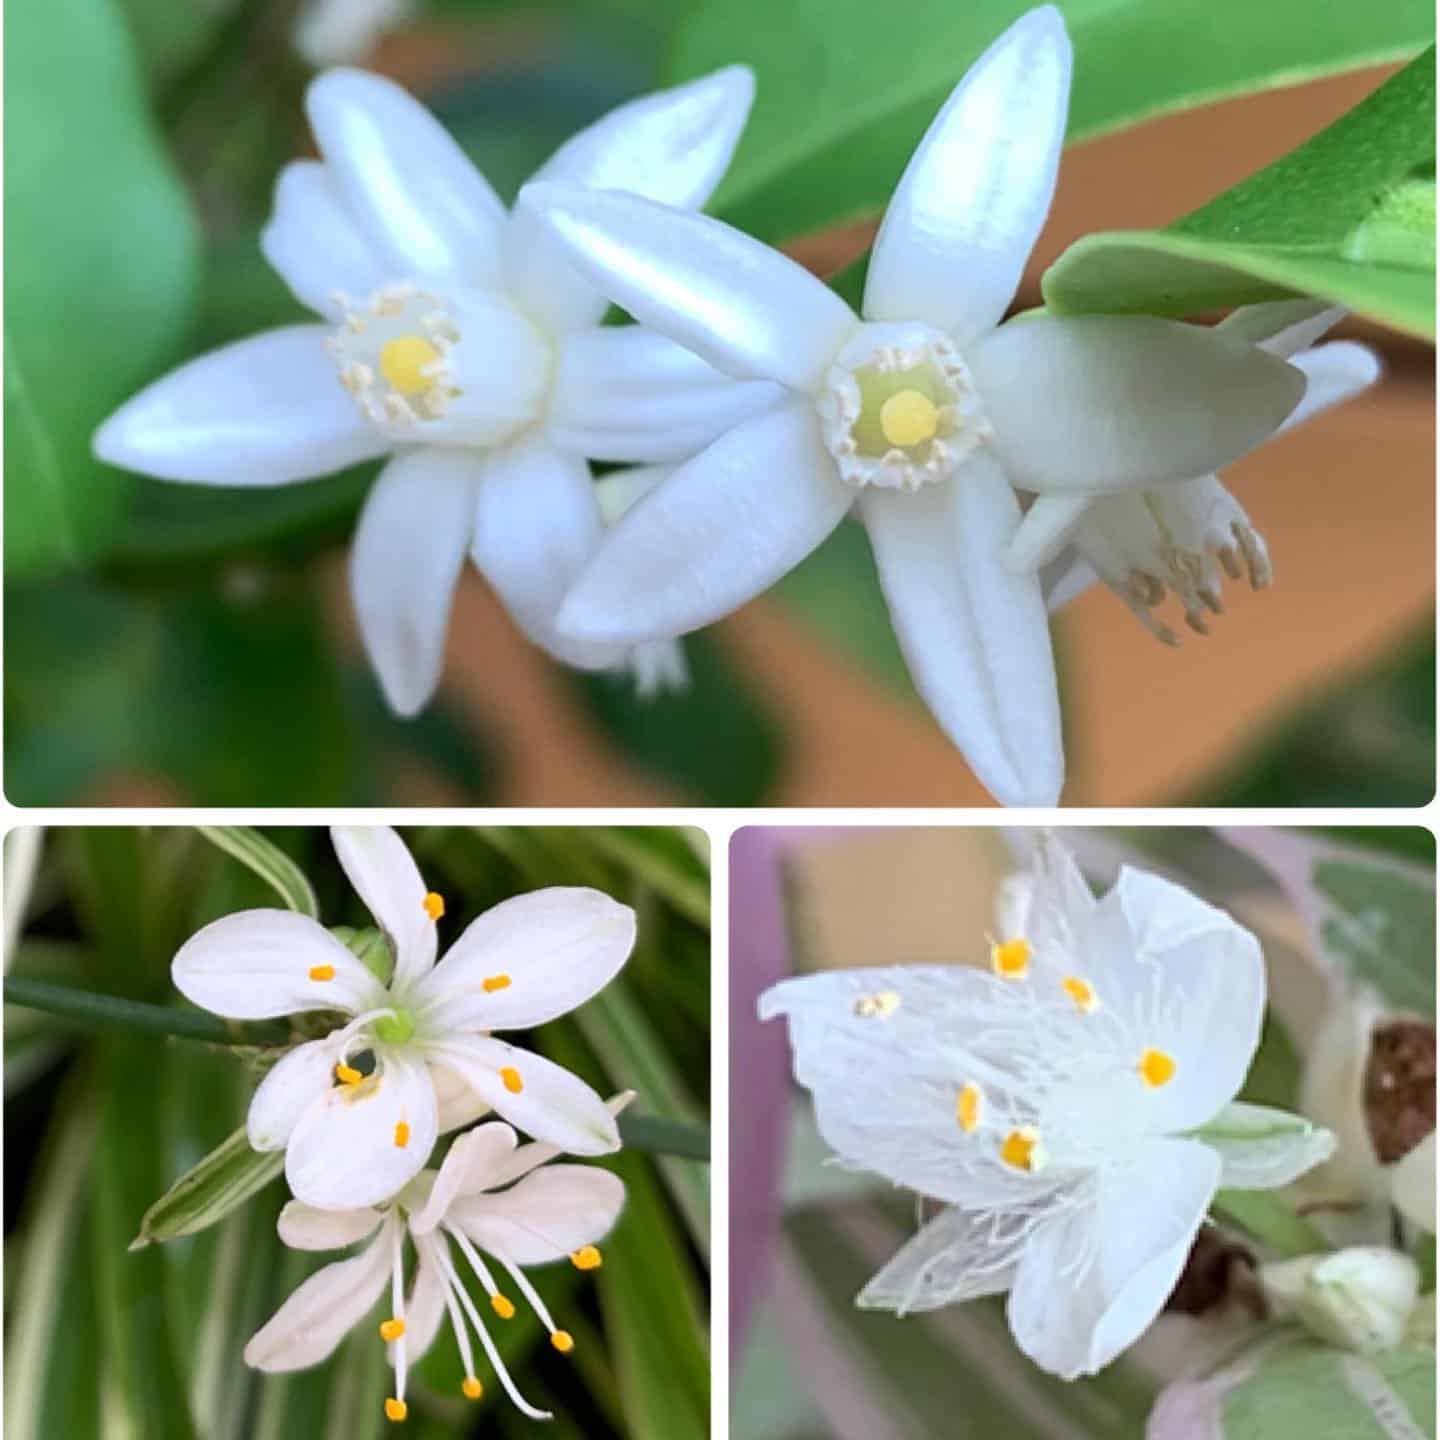
Blooms | Small, fragrant, star-shaped white flowers (if planted outdoor) |
Toxicity | Non-toxic |
Curly Spider Plant: Ultimate Grow & Care Guide
Ironically, if you perform more effort into curly spider plants, they may result in straighter leaves and not as expected curly.
So, here is a complete guide you can mimic!
Parameters | Favorable Conditions |
---|---|
Sunlight | 6-10 hours of direct bright light |
Watering | Every few weeks in Winter and every week to two weeks in Spring and Summer. |
Temperature | 50° to 80°F |
Humidity | Between 40% to 70%. |
Soil Type | Moist but well-drained |
Fertilization | Every two weeks to once every three months |
Pruning | Once every 1-2 years |
Pots | Plastic Pots with draining holes |
Repotting | Once every 1-2 years |
Propagation | Via spiderettes, cuttings, plant division and seeds |
Common Pests | Aphids, mealybugs, scale, spider mites, and whiteflies |
Horticultural Disease | Root mycoses |
1. Bright Indirect Light
Although curly spider plants are tolerant to low light, that doesn’t mean they perform well without sun. With more low light, their growth rate gets slower, and they may even lose their stripes.
Curly spider plants perform their best in 100% bright indirect light of 6-10 hours a day.
If placed in the bright direct light or provided with low light for a long time, curly spiders can show up a number of unexpected symptoms.
Signs of Low Light | Signs of Excessive Light |
---|---|
Slower growth rate or absence of new growth | Overheat and burn of the tips |
Leaves leaning towards the source of light | Presence of brown patches on the leaves |
Loss of stripes on the leaves | Yellowing leaves |
Changes in the leaves color and discoloration | Thickening of new growth |
Rotting smell from the soil | Extra flaky and dry soil |
Tips To Maintain The Perfect Sunshine
- If you wish to plant them outdoors, partial shade is ideal for them. However, if you plant them indoors, it is best to keep them in an eastern-facing window.
- During summer, it is best to avoid them from south-facing windows. Likewise, sheer curtains help them with indirect sunlight.
Expert Tip! If you have placed your curly spiders in the bathrooms or other rooms where natural sunlight is not accessible, move the plant to or near a window at least once a week.
- Here if your room does not get any sunlight, you can also opt to keep the plant under a fluorescent or grow light.
- Rotate the plant throughout the year to give equal light to the entire plant.
- You can also cover the plant if it receives harsh sunlight near the window.
- Similarly, sprinkling a cup of water during summer can relieve the plant if it is in the verse of drooling.
If you still want to learn more tips, visit Spider Plant Light Requirements.
2. Moderate Watering
Curly spider plants can grow even with light water, which makes them a perfect asset if you have a busy schedule or forget to water. They love moist soil, but it should not be soggy.
The frequency of watering needs to be twice a week during the summer and once every 2 or even 3 weeks in winter for curly spider plants.
You can also water curly spider plants once a week on average but you need not continue this schedule for a long time if the plant does not do well.
Effects of Improper Watering
Curly spider plants need adequate watering, but if overwatered, they can get discoloration symptoms in leaves. When the discoloration worsens, the variegated leaves turn from pale green to yellow.
They may also start to receive brown spots at the tips and soo the leaves start dropping off. Further, the overwatered plants can cause waterlogged soil to invite root rot.
When there is an overwatering condition, pest infestation and fungal diseases are natural to occur.
Similarly, the curly spider plants can develop brown leaf tips and edges before the yellowing if they are served underwater.
Tips to Water Curly spider Plants Properly
- Water your curly spider plant when the top 50% of the soil feels dry.
- A simple way to test your soil dryness is to insert a wooden stick into the soil all the way until the bottom of the pot to know the moisture in the soil.
- Also, the best time to water is when the soil is nearly halfway dry.
- After you water your curly spider plant, you should drench the root ball until it is saturated with moisture.
- Similarly, drain out the excess water to avoid root rot.
- Another thing to keep in mind is to avoid tap water as it contains chemicals such as chloride and fluoride.
- Thus, using rainwater or distilled water is the best for your plant.
- Reduce watering routine during winter.
- Water thoroughly but allow the soil to dry slightly between waterings.
3. Warm Temperature
As curly spider plants are native to regions like Africa, they naturally thrive best when receiving a warm environment.
Even when Curly Spider Plant can tolerate temperature issues, it is quite hard for it when the temperature is constantly changing.
The ideal temperature for curly spider plants is between 50° to 80°F (10° to 27°C) but they can also survive between 70 and 90°F.
Additionally, you should make sure not to drop the temperature below 45° degrees Fahrenheit.
Often temperature above will not directly affect your curly spider plant. However, it will increase the transpiration rate and increase the uptake of potentially toxic micronutrients in the plant.
In the interval of time, the excess temperature can cause dry the moisture of the leaves and the curly spiders are left with dry and crispy leaves.
This can further invite brown patches on the leaves and soften the plantlets.
How if the temperature drops below the optimum level, the plants will suffer root rot due to insufficient evaporation. If the condition worsens, the plant undergoes leggy growth.
Tips To Maintain Ideal Temperature
- It is best to avoid drafty locations such as areas next to entrance doors or drafty windows.
- You can bring the plant inside the home if the temperature drops at night.
- Use heating pads or grow light if the cold is excess in the room.
- Also, covering the plant with frost blankets to save the plant from frost or cold.
- If it is harsh winter, withdraw the plant from the window.
4. High Humidity
Being a humidity lover, curly spider plants can thrive well with moderate to high humidity but at times do not function well with high humidity.
Curly spider plants often prefer humidity between 40% to 70%, while they also do well in average room humidity (30% to 50%).
If they can not adapt to the favorable humidity, the following symptoms will be visible.
Symptoms of Low Humidity | Symptoms of Excessive Humidity |
---|---|
Browned curls with crispy texture | Loss of water from the leaves |
Loss of moisture in leaves causing it to dry out | Moldy plants and soil |
Brown tips with scorched leaves | Plant acts as the breeding ground for fungal infection |
Wilted and dropping leaves | Blackened leaves |
Tips To Maintain Humidity in Curly Spider Plant
- You can opt for simple regular misting with a cup of water. But it is better to mist it only once every two to three weeks during winter.
- Keep the plants together to create a forest feel.
- The pebble trays or gravel trays can be good as the evaporated water will maintain moisture in the air.
- You can also use a transparent plastic bag to create a greenhouse effect.
- Similarly, humidifiers do their best to increase the humidity of the plant.
5. Well-draining Soil
The soil that dries up well and contains rich nutrients can be the best home for Curly spider plants.
Thus, curly spider plants need loamy, moist, and well-drained, with a pH level ranging from 6.0 to 6.5 with a high tolerance up to 7.0.
DIY Recipe: Combine 2 parts succulent soil mix, 1 part coconut coir or peat moss, and 1 part high-quality compost.
Alternatively, you can also use the following DIY recipes:
- 3 parts organic potting soil
- 1 part perlite, use coarse sand, vermiculite, or pumice
- A handful of earthworm casting, compost, or sphagnum peat moss
- A handful of coconut coir or orchid barks
A drier potting mix will result in much curlier foliage, however, too much drier soil will get a lot of yellow and brown leaves.
If you don’t want to dirt your hands, you can buy the commercial potting mixes from the links below:
- Wonder Soil Organic Potting Soil: Includes worm castings and perlite
- Miracle-Gro Houseplant Potting Mix: Includes perlite, sphagnum, and peat moss
- Burpee Organic Potting Soil: Contains coconut coir
- Perfect Plants Organic Potting Mix: Great for indoor and outdoor use
- Espoma Organic Potting Soil Mix: Rich blend of sphagnum peat moss, humus & perlite
You can also pop up the article “The Best Soil for Spider Plants” to make your plant always healthy.
6. Annual Repotting
One of the specialties of curly spider plants is that they prefer to be crowded. Hence, the pots made of unglazed ceramic or terracotta are bound to break if you go too long without re-potting the plant.
Therefore, plastic pots with drainage holes are the best option to keep their roots intact. Additionally, these pots are non-porous, and you do not have to worry about water leaching away.
Also, the curly spider plants need repotting once every 1-2 years during the growing season (spring and summer).
Here, you will need a pot of four to six inches in diameter for a young plant. The ideal size pot will be about one or two sizes larger than the plant’s root ball.
Signs Curly Spider Plants Need Repotting
- When the spider plant’s roots are coming out of the drainage hole
- When the roots start to show above the soil level
- If the soil dries more quickly than usual causing your plant to wilt
- If your planter has cracked
If you notice the above-mentioned points during autumn or winter, you should wait until spring.
Steps to Repot Curly Spider Plants
- Gently remove the curly spider plant from its current pot.
- Inspect the roots if they are caught infections or if they are extended unnecessarily
- Rinse and trim its roots to fit the plant in the pot
- Prepare the potting mixes and take the plant into a new pot.
- While repotting, make sure your new pot has a good drainage system.
Tips To Keep In Mind For Repotting
- Before repotting, wait until its roots are big enough for the pot.
- Also, water the plant a day before repotting to make it easy for your to take out the plant from the pot.
- Do not repot the plant in winter when sunlight and temperate remain low.
- After repotting, continue with regular care requirements.
7. Light to Moderate Fertilizer
It is true that curly spider plants are not heavy feeders so you need not bother to fertilize them often.
Curly spider plants can accept the food every two weeks to once every three months, based on the type of fertilizer you apply.
For the fertilizer choice, you can use any all-purpose, complete, water-soluble, or granular time-release fertilizer suitable for houseplants.
If you want to buy commercial fertilizers, the following links can be helpful for you!
- Miracle-Gro Water Soluble Food: For all indoor plants, including edibles
- Schultz All Purpose 10-15-10 Plant Food: Excellent for transplanting, repotting, and rooting
- Jobe’s 5001T Houseplant Indoor Fertilizer: Best for non-flowering houseplants
- J R Peters 52024 Jacks Classic Fertilizer: A proven performer in the vegetable garden for generations
- Joyful Dirt House Plant Food: Best indoor plant fertilizer
You should not offer an overdose of fertilizer to your curly spider plants to grow them faster and if you do, the following results can be in your plant.
Overfertilizing Effect
Indeed, fertilizers provide your plant with all the needed nutrients; however, curly spider plants can be sensitive to the buildup of salts.
As they are not a heavy feeder, overfertilizing can exhibit brown tips in your plants as a result.
These salt builds are never a good thing if in an excessive amount, as they can damage the roots, which will eventually affect the leaves.
Not to mention, excessive fertilizer will reduce the production of plantlets.
You can also learn 12 Spider Plant Problems And Their Solutions if your plants suffer more!
Tips to Fertilize Curly Spider Plants Properly
- It is best to provide a weak liquid fertilizer once a month throughout the growing season.
- The water-diluted fertilizer is only to be used during summer and spring and should not be used during the wintertime.
- Water the plant adequately before the day of fertilizing.
- You can also use neem cake with 6-1-4 NPK content as plant food.
- Avoid touching the fertilizers on the parts of plants such as leaves, stems, flowers, and roots.
- Always give fertilizers outside of the home or in the garden to avoid contact fertilizers with children and pets.
8. Occasional Pruning
Curly spider plants are also perfect as hanging plants. Often they do not grow to be really long; however, if you wish to maintain their ball-like nature, pruning helps a lot.
You can prune your plant for a thick and dense look. A quick pruning makes the individual curls in your plant stand out.
Furthermore, pruning also assists your plant in rejuvenating its overall health and vigor. It will help if you trim off the brown leaf tips and spiderettes.
Curly spider plants need once every 1-2 years during spring or, in most cases, summer.
Although there isn’t a perfect pruning routine, you should ensure to prune as soon as you start seeing yellow or brown leaves to stop further damage.
Yet again, you should also add root pruning to the list once every year or two.
Tips to Prune Curly Spider Plant
- Before you start pruning, make sure that you have sharp or sterilize pruners or scissors.
- Inspect and remove all discolored, diseased, or dead foliage of the plant.
- Cut them from the base of the stem to remove spiderettes.
- You need to avoid heavy pruning to make it more healthy.
- Also, you should not prune the plant during the winter.
Curly Spider Plant: All About Growth Rate
There are over 200 species of spider plants, of which some reach heights over a meter, and spider plants are faster-growing plants than other average household plants.
In general, curly spider plants tend to grow to about 60 to 70 cm tall and sprout around the pot and quickly become bushy.
It has fleshy and tuberous roots extending from 5 to 10 cm (2–4 in) long. Also, curly spider plants can live up to 20-50 years if provided with good care.
The hanging basket is the best place where curly spiders can grow to their fuller size.
The most attractive parts of the curly spider plant are its white stripping on leaves that grow up to 20 meters long.
With green and white variegation and curly leaves, they do not tend to flower when planted indoors.
However, they produce small, fragrant, star-shaped white flowers with flower stems that can be up to 75 cm long if you place them outdoors.
Curly spider plants also produce inflorescence that grows up to a length of up to 75 cm (30 in).
Curly spider plants bloom throughout the summer and spring.
Altogether, curly spider plants are compact, and their leaves help maintain a ball-like shape. Hence, you can turn it into a bushy sphere if you like.
If you want to extend this information to a broader, read Spider Plants Flower.
Toxicity of Curly Spider Plant
If you are obsessed with spider plants, you need not fear anything that has myth around it. You can not have any disadvantages or harm from this plant.
According to the ASPCA, Chlorophytum comosum is non-toxic to both your dogs and cats.
However, spider plants possess chemical compounds which are believed to be related to opium that can cause an upset stomach, vomiting, and diarrhea.
Hence, whenever your fluffy pets look rather wide-eyed after eating these plants, this is caused by the mildly hallucinogenic effect.
If you feel an emergency, you can take help from the following hotlines:
Propagation Methods for Curly Spider Plant
It is easy to populate curly spider plants to make a little jungle inside your home. I have explained some propagation methods for this and propagation through plantlets and cuttings is much easier.
Propagation Via Plantlets
One of the charms of the curly spider plant is the number of plant spiderettes (babies) that it produces. You can perform this in two mediums.
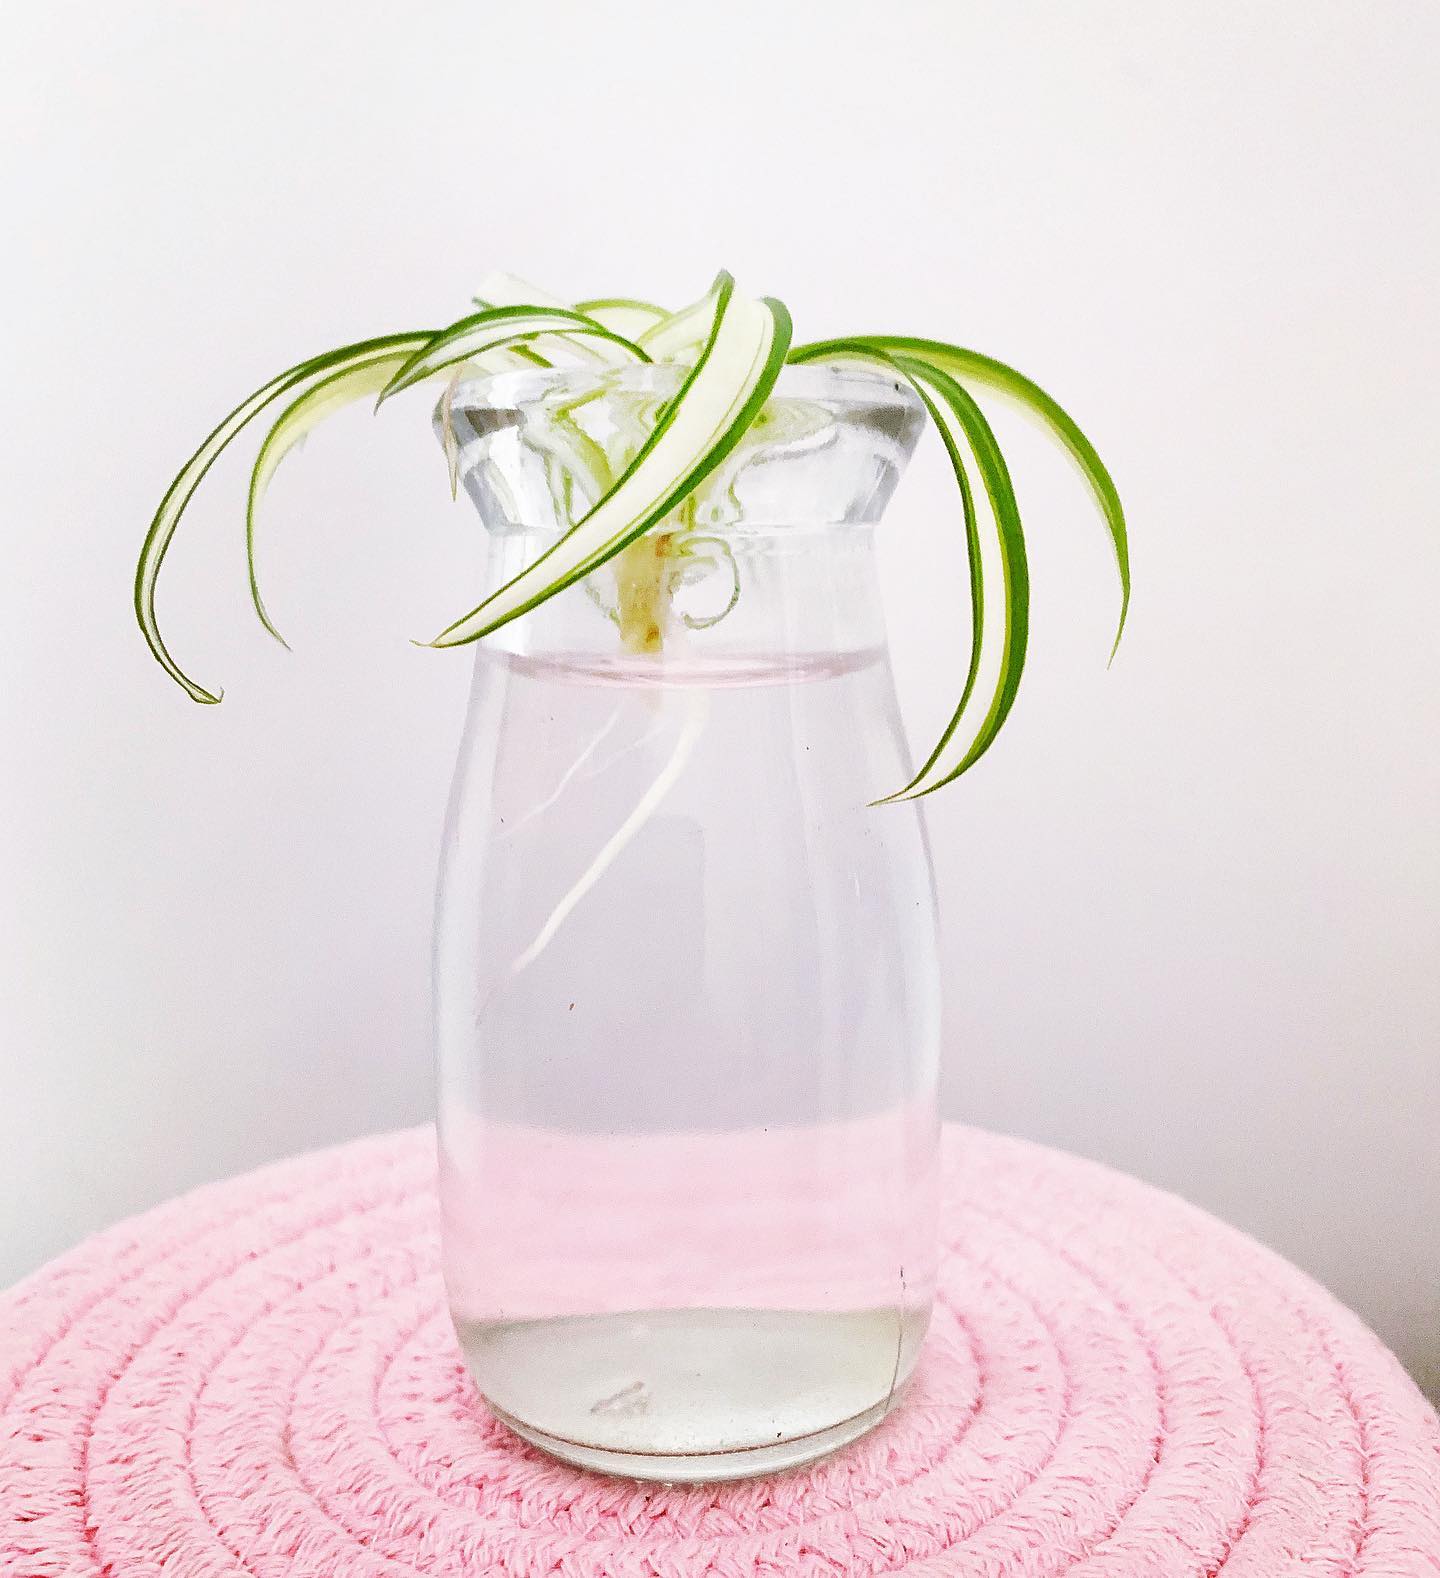
Propagatigation in Water Medium
- Take offsets that at least contain some small aerial root buds developing already, if not, larger roots are also good to use.
- Cut off the spiderettes from the stem.
- Fill the jar with water and position the spiderettes to hold leaves above the rim of the containers.
- Change the used water regularly in the jar if it starts to look murky.
- Now, Waite until there appears at least an inch or two of root growth.
Propagation in Soil Medium
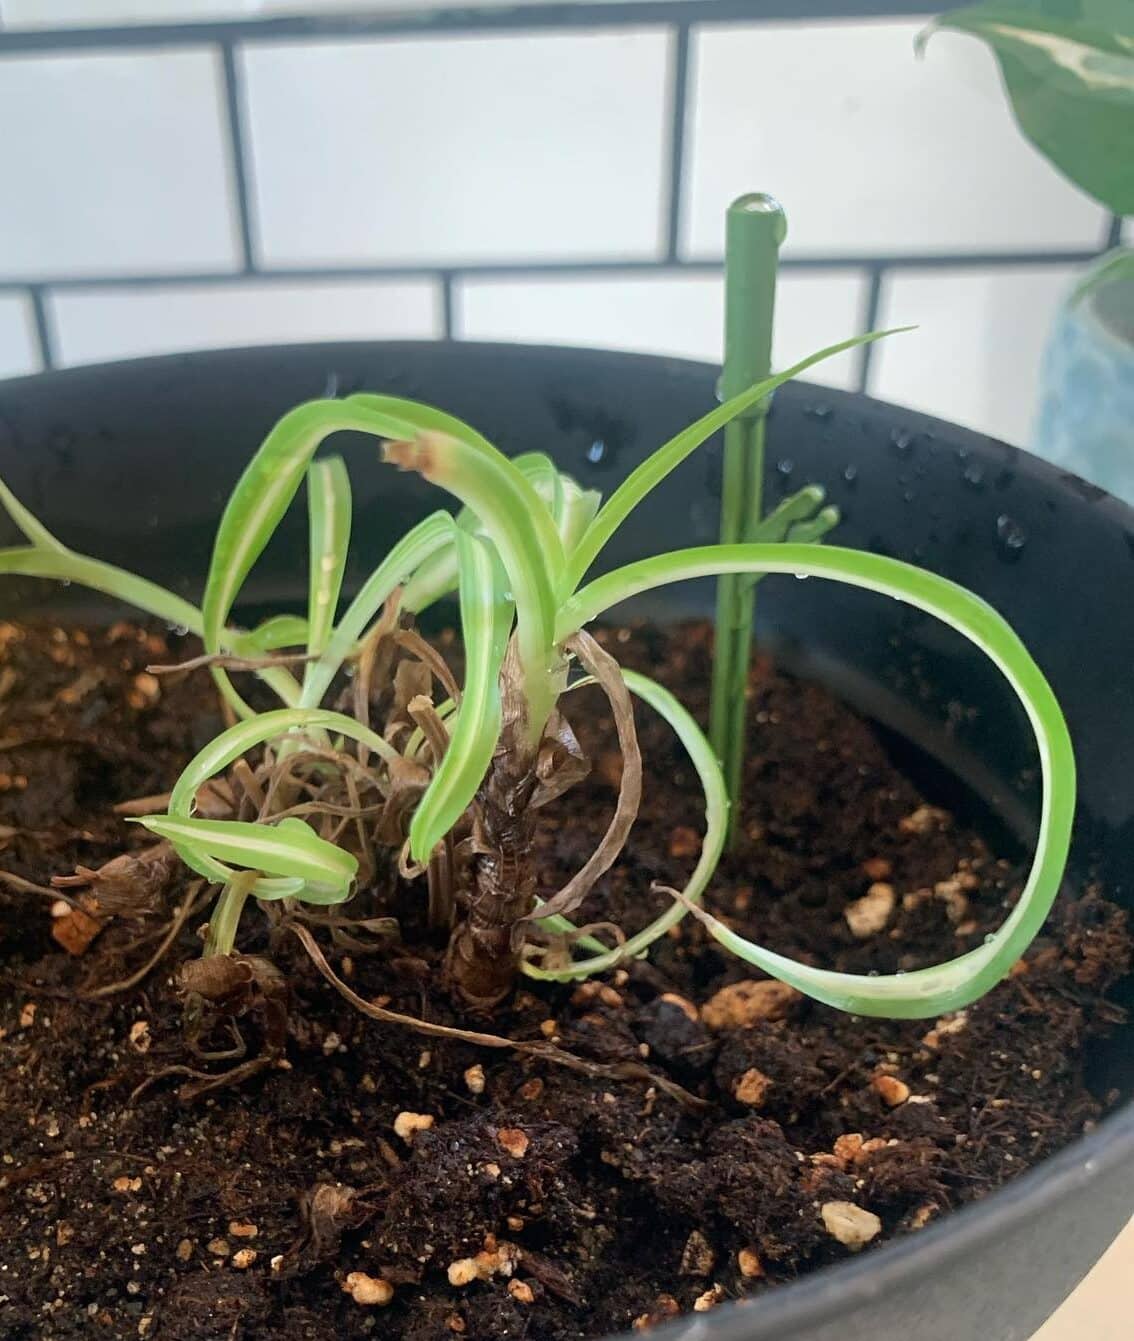
- Select the available spiderettes, pruning them from their stems with scissors or pruners.
- Fill the planter with potting mix, leaving 1/2 an inch of space between the surface of the soil.
- Now, poke an adjustable hole in the middle of the pot with the piercing tools and insert the spiderette’s roots into the hole.
- After that, water the offset. For this, a mini spray bottle can be helpful.
- Place the offset in a location with medium or indirect bright light.
- Soon, you will notice new growth on the spiderette.
Propagation Via Layering
In the layering method, you need to wait until after offset roots instead of cutting the offset. However, the roots of spiderette need not be very developed at all.
- Drape the stems of the spiderette across the new pot to center offset over the new pot.
- Poke a hole in the pot if the offset has already well-developed roots.
- Next, weigh the stems down with a stone or any other tools.
- Now moisten the soil with a mini spray bottle.
- In a few days, you will see the offsets rooted. Once done, you can cut it from its stem.
- Once the plantlet has new growth, you can switch from a spray bottle to a watering can.
Propagation through seeds is also possible but you need to make the extra effort and expert knowledge. If you to make it possible anyhow, instantly jump on to Spider Plants Seeds.
Propagation Via Plant Division
It will be the best propagation option if your plant doesn’t contain any offshoots. If there are at least two clumps growing in the pot, it is possible to split them apart and start propagating.
- Take a healthy plant and divide them into two or three sections.
- You can pull the clumps using a sharp, sterilized knife if necessary.
- Cut dead roots or leaves from the section if present.
- Plant those divided sections in clean glass water and wait for them to develop new roots.
- Use a spray bottle when watering the newly propagated plant.
- Once there are new 1-2 inches long roots growing, you can switch from a spray bottle to the watering can.
Common Problems
When the curly spider plant receives unfavorable conditions, it may encounter some common problems which include browning tips, curling leaves, root rot, leaf blight, falling leaves, no new growth, etc.
However, the pests or the diseases are some other troubles if you neglect your plant for no reason.
1. Common Pests
Some of the common pests they face are mealybugs, spider mites, aphids, whiteflies, and scales.
These pests attack the curly spider plants when the plants become vulnerable due to lack of sunlight and if there is high moisture in the leaves.
Here is a table about these pests and their signs.
Common Pests | Signs |
---|---|
Mealy Bugs | These tiny waxy bugs contain white-cotton like substance. They occur on the undersides of the leaves. |
Spider Mites | These pests are yellow halo like structure on the leaves. When they attack, leaves appear speckled and wilts, limps, and droops. |
Thrips | Yellow speckled and silvered pests on leaves. The leaves appear black due to thrips. |
Scales | Shell-like bumps on plant stems and the underside of leaves Thrive in warm, dry environments |
Aphids | Tiny, pear-shaped pests in a variety of colors, which live undersides of the leaves Prefer wet conditions |
Treatment Measures
- First, sterilize the pruning shears and cut off the infected parts.
- Immediately apply either insecticidal soap or neem oil.
- Take a cotton ball. Dip it in isopropyl alcohol and move it along the infected parts.
- A blast of water helps in washing off pests and their eggs.
- Take a blunt knife and scrape off scales.
- You can also use insecticidal soap and neem oil to treat these bugs.
Preventive Measures
- Avoid grouping the plant with other infected plants.
- Spray the plant weekly with soap water and wipe them off to knock off pests.
- Sneek a peek at your plant regularly for signs of infection.
- If you plan to use pesticides, apply them over the plant at intervals and in schedules considering the quantity applied.
- Ungroup the plants if the pests have significant signs on the leaves or stems.
2. Horticultural Diseases
As a matter of fact, there ain’t many common spider plant diseases. However, they at times suffer from fungal leaf rot and fungal root rot.
These diseases are reported to infect through the genera Alternaria, Colletotrichum, Cercospora, Fusarium, Helminthosporium, and Phyllosticta.
The spider plants are also prone to have root mycoses caused by Pythium splendens, Rhizoctonia solani, and Sclerotium rolfsii.
Treatment Measures
- Separate the infected plant if there is a mini garden indoors or at home.
- Prune or trim the infected or damaged leaves.
- Keep the plant in partial gentle shade to avoid the fungal attack.
- Stop watering if the plant suffers from the root rot.
- Also, make a gap in fertilizing schedule.
Preventive Measures
- Avoid watering the plant frequently during winter.
- Allow the potting soil to dry up in between the waterings during the summer and spring as well.
- Regularly check the soil moisture to prevent fungal infection.
- Prefer organic fertilizers over chemical fertilizers.
- Take the plant outside under the bright indirect light once a week.
Conclusion
Unlike traditional species, curly spider plants can create luxurious interiors if placed on a high pedestal or a hanging basket with good care.
Alongside its bushy and green vibes, curly spider plants help to purify the air, enabling you to enjoy a healthy plantsman lifestyle.
I am sure you have covered all the above-discussed care requirements when growing your curly spider plants and enjoy the maximum plant leverages.
Keep growing plants and make healthy earth!