People usually gift Hosta seeds showing devotion in friendship, but not all the seeds remain true as some may not grow!
When my friend offered me some Hosta seeds, I immediately rushed to sow them to check whether our friendship remained true, unlike the seeds.
Thankfully, my friendship was saved as the seeds showed vigor in growth after a few efforts, and the plant is already halfway there to adorning more seeds this season.

Since my Hosta is doing great, I have been getting a lot of requests to buy seeds from the same plant.
You may not get physically what you expect, but you can learn to get the idea of collecting the Hosta seeds and growing them from the article!
Table of Contents Show
What do Hosta Seeds Look Like?
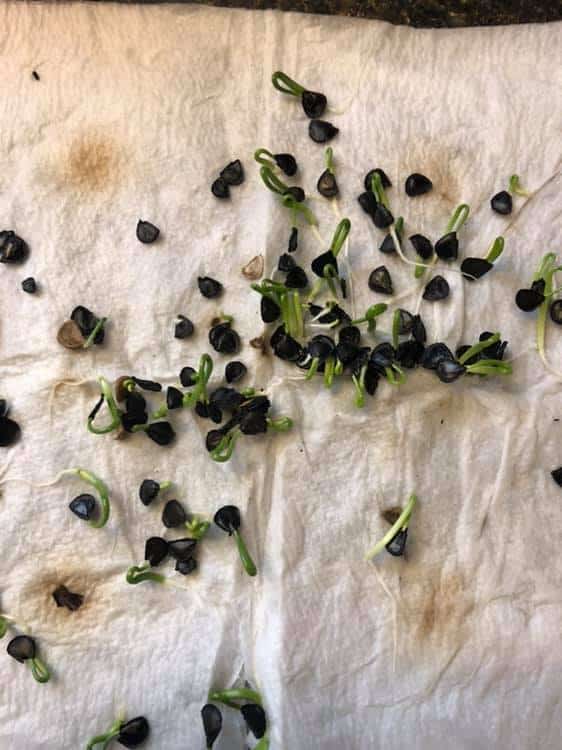
Hosta seeds are long, flat, and completely black. They are light in weight and have a papery texture.
Most Hosta cultivars are sterile, meaning they cannot set the seeds.
But, if you are lucky enough to bring a flowering variety, the plant can beget the seeds after pollination.

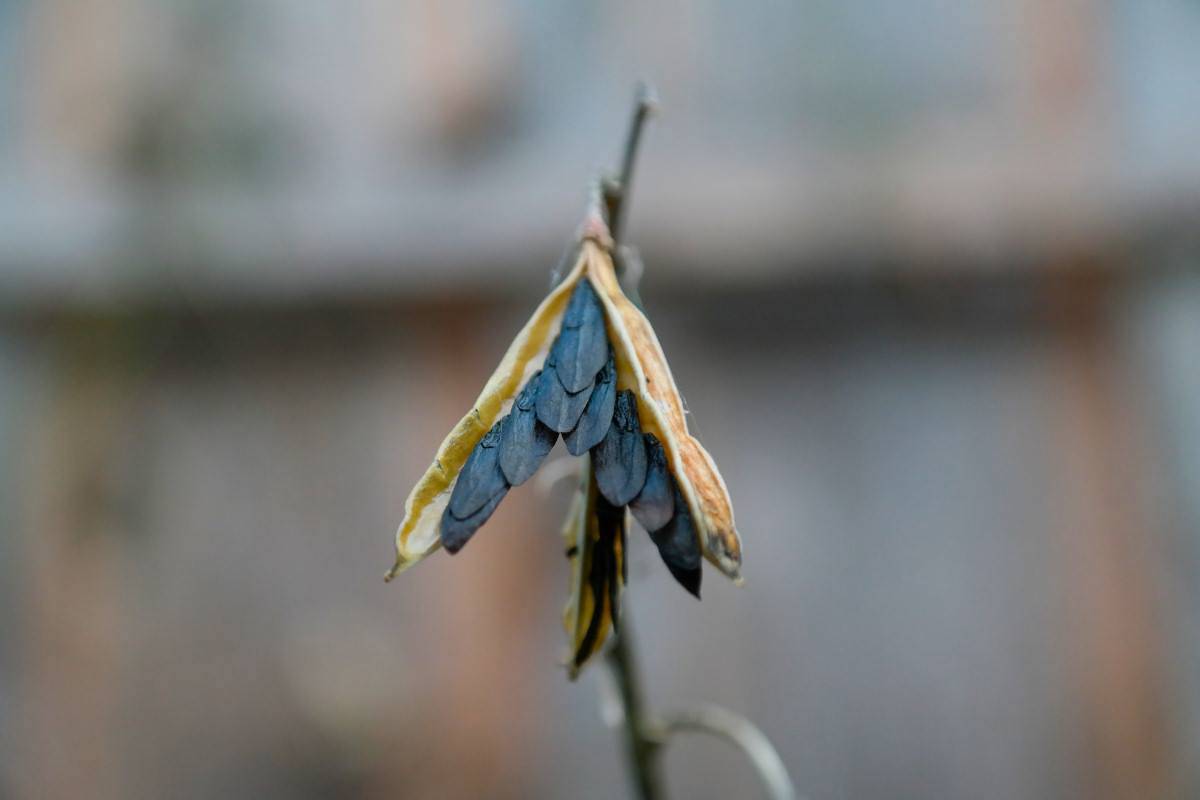
Once the seeds are set, they cuddle inside green, immature, six-chambered, and elongated seed pods.
Soon, the pods dry out and split longitudinally, revealing the seeds.
Let’s see some features of the Hosta seeds in the table.
| Indicator | Identity |
|---|---|
| Color | Black |
| Size | Length: 7-10 mm Width: 3 mm |
| Shape | Long, flat, and elongated with papery texture |
| Weight | 0.0044 gm |
| Flowers | Arrangement: Bell-shaped blooms arrange in a spike along the flowering stem (like that of Lily) Color: Lavender to white |
| Flowering Season | Early summer to early fall (depending on the cultivar) |
| Pollination to Seed Maturity | 4 to 8 weeks |
| Time of Seed Harvest | Early to late fall |
| Germination Time | 1 to 8 weeks |
| Sowing Time | Ideal Time: Early spring (outdoors or indoors) Headstarting: Mid-winter (indoors) |
Although Hosta seeds are viable as long as you place them in a dry condition, it’s better to sow them fresh after harvest.
One of the good things about Hosta seeds is that they don’t require pretreatments to induce germination.
You can directly sow them in the soil, but not all the seeds from the batch have equal germination rates.
Not all the seeds are forgiving like Hostas. Rather Seeds of Canna Lily need pretreatments to excite them for germination.
How to Harvest Hosta Seeds?
Like all flowering plants, the seed-setting journey of Hosta commences from pollination.
The Hosta Plant is decorated with colorful and fragrant blooms that lure pollinators like bees and occasionally hummingbirds.
Flowers stay from early summer to early fall, during which pollinators help to pollinate the Hostas.
The flowers fade after pollination, and within 4 to 8 weeks, the flowers are replaced by green pods.
The pods mature in early to late fall and split longitudinally after the pod’s color changes from green to light yellow.
If the pods fall before they dry, the seeds inside are no good for you.
Once the pods split open on the plant, prepare to collect the seeds.
Steps to Harvest the Seeds from the Hosta Plant
Some cultivars of Hosta bloom late, so it’s hard to keep a time track to collect the seeds.
If you have such late-blooming Hostas, leaving the pods hanging on the plant is ideal until the seeds mature.
However, seeds from seasonal blooming Hostas can be collected once the pods dry out, turn light yellow, split open, and the seeds are visible.

Grab a sharp pair of scissors, gloves, tweezers, disinfectants, and a white linen cloth to collect the seeds.
Then, follow these simple steps to collect the seeds.
- Place a square meter of linen cloth below the flowering stem of the plant.
- Gently give the stem a shake. The seeds may fall into the cloth below with their pods.
- If this doesn’t work, cut the pods off the flowering stalk using scissors.
- Then collect the seeds on the cloth by hand or pick them using tweezers.
- Use your fingernails to split the pods if the pods are light yellow and dry but not opened.
- Separate the seeds from the pods using the tweezers one by one.
- Collect the seeds in one place and throw the dried pods or other leftovers.
- Alternatively, you can cut the entire flowering stem using scissors from the base and place the stem with pods to store.
- Later, you can collect the seeds from the pods after they parch up or split them manually.
After you detach the seeds from the pods, prepare to store and dry them.
Do you know the most Hostas grown in houses are hybrid cultivars? Seeds from these cultivars don’t remain true to their parents and don’t resemble their parent plants in many features.
Steps to Dry and Store the Hosta Seeds
The moisture left on the seeds may cause fungal growth, so store the Hosta seeds after you dry them.
However, Hosta seeds can be dried and stored simultaneously. To do this, rely on these basic steps.
- Wear gloves and take a paper envelope.
- Place the collected seeds in the envelope.
- Label the envelope using a marker to record the collection date.
- Grab a clean shoe box and place the envelope with a silica gel sachet.
- Place the seeds in a cool and dry place at room temperature.
- You can also place the seeds in an air-tight container inside the fridge and later sow them in the season.
Cold-store seeds can remain viable indefinitely, but sowing the seeds right after harvest ensures favorable germination results.
Likewise, you can also separate the viable seeds from the non-viable ones and store them.
If the seeds have a small bump at one end and are black, they are viable. Place and label the viable seeds in a different envelope to sow them for later.
A thorough process of collecting Hosta seeds is shown in the video, along with some additional info.
Hosta Seeds for Sale
Viable seeds of Hostas are hard to get by. Even if you get hands-on with some viable seeds, they may be of a different variety than you expect.
Many seeds may not sprout plants as they may be totally dried out at the time of packaging.
But, before any dismay, here are a few well-known and recommended online retailers where you can buy viable seeds.
| Shops | Delivery Time |
|---|---|
| Etsy | Within 3 to 7 days after placing an order |
| Swallow Tail Garden | Within 1 to 2 weeks after placing an order |
| Burpee | Within 7 to 14 days after placing an order |
| The Hosta Farm | Within 2 to 3 days after placing an order |
Can you Grow Hosta from Seed?
Viable seeds of Hosta show prolific germination within 1-8 weeks after planting, but this depends on the cultivars.
Growers usually sow the seeds in early spring outdoors, but you can start the seeds indoors in mid-winter.
You can plant the Hosta seeds in the fall right after harvest (8-10 weeks before the last frost date).
Sowing them at this time is even best as the cooler nights help the plant to harden for winter.
Steps to Propagate Hosta via Seeds
You can propagate Hostas seeds in 4 basic steps: stratifying them, preparing the soil mix, sowing them, and transplanting them at the end.
Step 1: Stratify and Clean the Seeds
- Once you get the seeds, you must stratify them to give them a headstart. Stratifying is recreating the wintertime climate indoors that the seeds would face outside later.
- To do this, put the seeds on a paper towel, lightly moist, and place them in a zip-lock bag.
- Allow the bag to rest in the fridge for four to six weeks.
- Before sowing, soak the seeds in 1-5% Sodium Hypochlorite (NaOCl) solution for a minute.
- Rinse the seeds with distilled water 4-5 times to free them from bacteria and fungi.
Step 2: Prepare the Soil Mix and Pots
- Hosta seeds need well-draining, organically rich, and good water-retaining soil.
- Prepare your own by blending 10% cow manure, 45% peat moss, and 45% any seed starter mix. You can add perlite for extra aeration.
- Sustain soil pH levels between 6.5 and 7 by adding more compost.
- Take terracotta pots (between 2 and 7 inches in width) with drainage holes. The smaller the pot, the better it is.
- Fill the pots with the prepared mix to an inch below the brim.
- You are then ready to plant the seeds.
Step 3: Sow the Seeds
- Before planting the seeds, keep the mix for 1-2 days.
- At the time of sowing, moisten the soil with water.
- Poke several 1/2-inch deep holes in the mix using a chopstick.
- Place the seeds in the holes and barely cover them with the soil.
- Sow a dense cover of seeds in the pot to increase the chance of germination from most seeds.
- Cover the pots with plastic wrap to maintain a humid and warm environment.
- Place the setup in bright, indirect light and over a heating mat maintained at 15°C to 23°C during germination.
- Continue with light sprays of water if the soil feels dry to the touch.
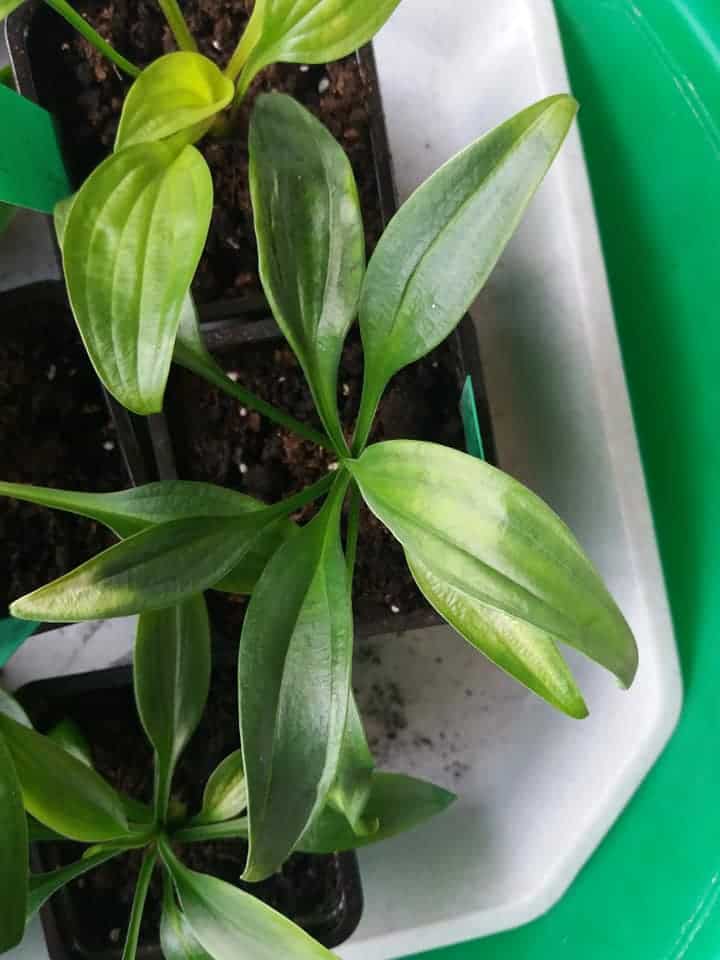
- The seeds may germinate within 1-8 weeks by sprouting small seedlings.

Step 4: Transplant the Seedlings
- Transplant the seedlings in spring once they adorn 3-4 leaves and are about 4-6 inches tall.
- Avoid transplanting in winter or when the garden soil is frosty.
- You can transplant the seedlings to a new wide pot or plant them directly in the outdoor soil.
- Dig a foot-wide hole in the garden soil at a spot that receives morning sun and afternoon shade.
- Amend the garden soil with perlite, compost, and peat moss.
- Uproot the seedling using a trowel by taking a few of its old soil and place in the newly dug hole.
- Gently stiff the soil around its root zone by hand and feebly saturate the soil with water.
Tips to Care for Hosta after Germination
You can upkeep Hosta seedlings by offering them all the accurate conditions.
Follow these recommendations to ensure the successful growth of Hosta before and after germination.
- Remove the plastic wrap once the seeds germinate and place the set up under LED grow lights for a full day until true leaves develop.
- Reduce the lighting to 10-12 hours if the seedlings show 3-4 new leaves.
- Maintain the indoor temperature around 71°F to 82°F.
Hostas can survive below -40°F and a bit above 95°F, but the plants go dormant at these temperatures.
- Fertilize every 4-6 weeks in spring using 10-10-10 NPK balanced liquid feed.
- Avoid fertilizing in summer, fall, or winter when the growth slows down.
- Water Hosta seedlings with 0.016 liters once a week in peak foliar growing seasons and cut watering in fall and winter.
- Repot Hostas once every 2-3 years in spring or early fall.
- Decide to cut back Hostas once a fall when more than 25% of the plant leaves turn yellow.
- Spray neem oil or insecticidal soap once a month after the seedlings initiate to produce good foliar growth.
From Editorial Team
Hostas are a wonderful addition to any garden, and you may save money by growing them from seed.
For example, the white flowers of Hostas can proffer a site of charm for your garden or patios.
Although some seeds may not flower into the desired variety, a bit of surprise won’t harm the garden décor. So, try to select and plant viable seeds after a proper harvest.
Remember to transplant the seedlings to more open space after they develop the proper roots.
Happy Gardening!