Schefflera plant roots outgrow the pot quickly, which may require repotting every few years to avoid root-bound problems.
However, root-bound is not the only reason to repot the plant. Changing the soil ensures the plant quickly gets the nutrients required for healthy proliferation.
Here is how you can repot your beloved plant in a few easy steps.
Slide the plant and soak the roots in water to untangle the mess before trimming the thread roots. Fill an appropriate-sized pot with a well-drained potting mix before transplanting and finish off with thorough watering.

Voila! Your new repotted Schefflera plant is ready to add charm to your room or office!
However, you should know how large your plant may grow before encountering root-bound problems.
Do not worry because here is a detailed guide to when, where, and how to repot your beloved dwarf umbrella plant!
Table of Contents
Reasons to Repot a Schefflera Plant
Indoor houseplants like Schefflera will require repotting once every few years to ensure healthy growth.
An excellent tropical plant, it proliferates pretty rapidly, often outgrowing its container and soil nutrients. Thus, repotting will provide it with fresh soil and extra room for roots to grow.
Here are the two primary reasons why you should repot your Schefflera plant.
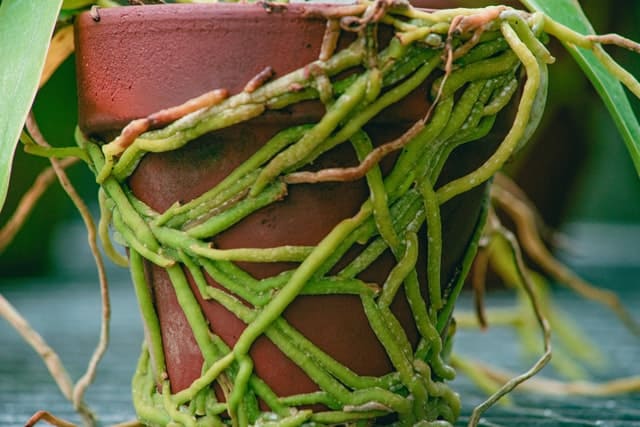
1. To Fix Excessive Root Binding
Although Schefflera enjoys root-bound conditions to thrive, excessive root binding will slow down the plant’s healthy growth.
Repotting it to a larger container will ensure the roots expand further for the proliferation of foliage and prevent damage and decay to the root system.
Consider repotting your plant every two years and trimming the roots to encourage the growth of feeder roots that quickly absorb nutrients from the soil.
2. To Replace Depleted Soil
The potting mix may naturally lose soil nutrients and microbes (inc. bacteria, actinomycetes, and fungi) every few years.
Repotting every few years or simply replacing the potting mix with a new potting medium will ensure that your Schefflera receives fresh soil rich in microbes.
It will also give the plant appropriate conditions to grow!
When to Repot a Schefflera Plant?
Spring is the best time to repot it into a new container because it will benefit from a growing season and ideal growing temperatures.
Repotting in spring and fertilizing every week during the growing season ensures that the plant gets fresh soil with soil microbes and nutrients immediately.
Moreover, the spring season is the ideal time for root trimming. It will encourage feeder root growth that sucks up nutrients quickly.
Depending on your plant’s growth and pot size, you can repot it every two years to encourage feeder root growth or replace depleted soil.
Furthermore, repotting in early spring will ensure that the plant roots establish themselves in the new soil and enjoy proliferation for another 6-8 months of the growing season.
What Size Pot does a Schefflera Plant Need?
Choosing an appropriate pot or container for the Schefflera plant is necessary to allow adequate drainage and room for the roots to grow.
Choose a pot 2-3 inches wider than the previous pot. Let’s say if your current pot is 12-inches, choose a pot that is 14-inches in diameter.

Make sure the pot is about the same size as the roots to ensure a balanced soil to root ratio.
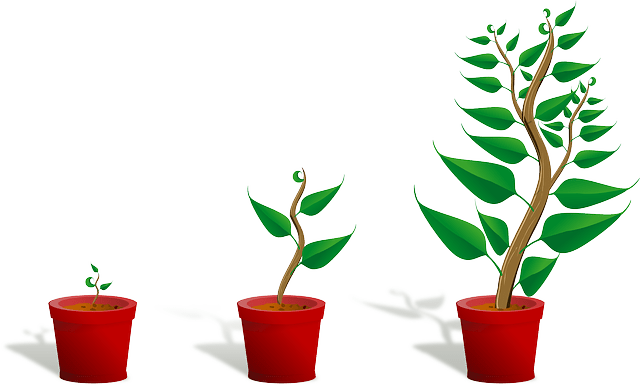
When the plant root is minimal for the first few years, you can use pots lesser than 18 cm (10 in.) in diameter.
As the plant starts to get taller with an extensive root system, use larger and heavier containers.
Pro Tip: As the plant grows taller, it will require a heavier pot to prevent it from tumbling.
Consider repotting the plant in the same pot if you are worried about lifting heavier containers or gigantic plants that outgrow their space.
Check out some of the pot choices here.
| Pots | Features |
|---|---|
| Resin, Ceramic Pot (5-10 gallon) | Comes in great styles and does not retain water but are less durable |
| Terracota Pot (5-10 gallon) | Ensures a good flow of water and air but is prone to algae formation |
| Plastic pots (5-10 gallon) | Prevents the growth of microorganisms but retains excess moisture |
| Clay Pots (5-10 gallon) | Ensures a good level of absorption but may break easily |
What Type of Soil Does a Schefflera Plant Need?
When planting or repotting Schefflera plants, choose a well-draining potting mix over average garden soil.
These plants love rich and moist potting mixed with loosely packed soil with a slightly acidic pH (6.0 to 6.5).
Thus, make sure to get a potting medium that is ideal for houseplants and uses the same medium every time you repot Schefflera plant.
You can get a commercial mix from the market or make your own at home within a few steps.
1. Commercial Potting Mix
Using a commercial potting mix is an excellent choice for the Schefflera plant because it provides an appropriate soil condition and pH for root and foliage growth.
Choose an easy-to-water potting mix that contains no compost or bark, which encourages fungus growth.
Use a commercial-grade Miracle-Gro® Indoor Potting Mix for your beloved plant, which does not require adding any fertilizer for up to a month or six weeks.
To avoid soil compaction during repotting, ensure to use the same potting mix every time during repotting.
2. Homemade Potting Mix
Alternatively, you can prepare your potting mix at home within a few steps.
The primary ingredient for a potting mix is Sphagnum peat moss, vermiculite, and perlite. It naturally has an acidic pH ranging between 3.5 and 4.5.
Here is how you can prepare a nutritious potting mix at home.
- Add 1 part garden soil and 1 part moistened sphagnum moss
- Add ½ part perlite
- Add ½ part vermiculite
- Add coarse sand to the mix if the solution is too dense.
- Test the soil for an appropriate acidity level using a DIY soil test pH kit.
- Add ¼ part pulverized calcite limestone or dolomitic limestone to neutralize the soil pH.
- Finally, amend the potting mix with fertilizer to add the required nutrients. Use reliable plant feed like Earth Premium Gold and Espoma 5-3-3 Plant Tone.
Do not forget to water the mix after repotting the plant, and drain the excess water out.
Use the batch as quickly as possible when making a DIY potting mix.
Place the mixture in a sealed plastic bag and store it in a cool, dry place if storage is necessary.
How to Repot a Schefflera Plant?
Repotting ensures that the root gets room to increase and stay healthy.
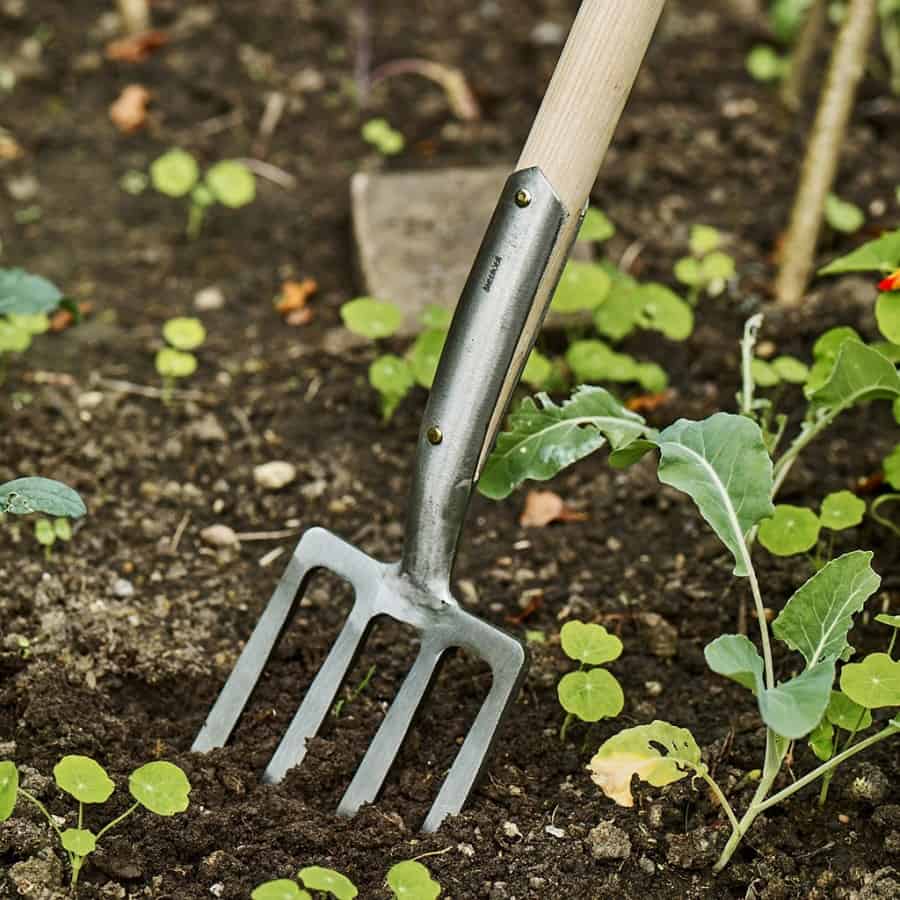
Do not forget to get essential gardening tools beforehand; a trowel, gloves, pruning shear or scissors, pots, and a small container.
Here are six easy steps to repot your beloved plant without using any particular tool or technique.
Step 1: Determine Repotting Need
Start with looking for signs that your plant needs a new pot or a soil change.
In the case of root-bound plants, you will notice the root tips coming through the drainage hole or the soil’s surface. Get a new pot 2 inches larger than the current pot.
For a soil change, check for signs of stalled or slowed plant growth. It may happen when the root becomes crowded or the soil loses its nutrients and essential microbes.
Generally, the Schefflera plant needs soil change every two years and root trimming to ensure the feeder root gets essential nutrients immediately.
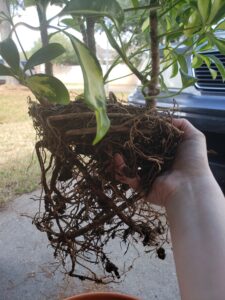
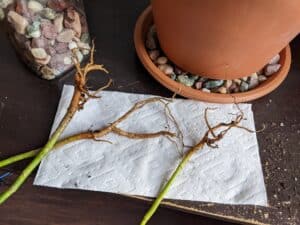
Step 2: Check for Root Problems
Before transplanting into a new pot, ensure to detangle the crowded tentacles and check for any root problems.
Carefully take out the plant from the current container and dip the entire root system in a bucket of water to loosen the roots.
Use a clean fork, chopsticks, or fingers to untangle the roots and check for visible signs of root problems such as brownish roots or smelling blacked roots.
Healthy roots that are firm and white will stay, and the rest will go!
Step 3: Trim the Roots
Trim the dead and excess roots. Root pruning ensures that the plant root does not quickly outgrow the new pot.
Start with trimming dead roots that are blackened, dark, or brownish. Use a disinfected shear to weed them out.
Next, disinfect your shear before trimming root for proliferation –Cut the thread roots but taproots.
The taproots are more extensive roots that stay intact to the plant. Remove no more than 1/3 of thread roots.
Consider propagating your Schefflera plant with the healthy stem.
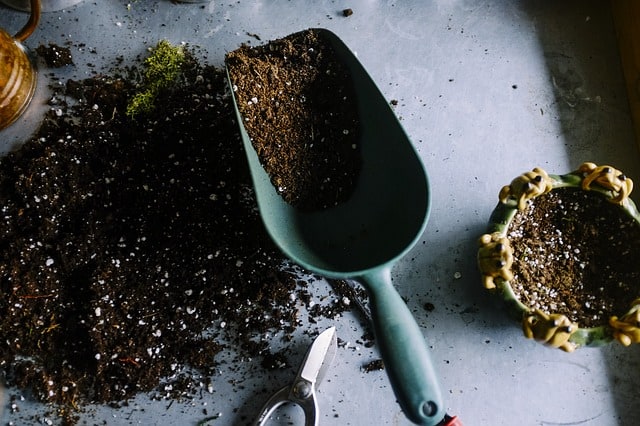
Step 4: Prepare the Pot with Potting Mix
Fill the new pot with either a commercial-grade potting mix or your homemade potting medium.
Before placing the potting mix into the pot, please give it a thorough rinse or loosen the soil with your hand or spoon. Do not forget to wear gloves, preferably plastic gloves.
Using the trowel or hand, place the potting mix into the pot up to half but do not pat it yet.
Note: The Schefflera potting soil should contain the appropriate amount of sphagnum peat, vermiculite, and perlite to ensure a well-drained and well-aerated potting mix.
Step 5: Transplant into the New Pot
Place the plant in the pot and gently press the roots into the potting mix, but prevent the root from touching the pot.
A space between the root and pot floor will provide enough space for the root to increase downwards.
Next, slowly fill potting mix around up to the soil level of the original plant and pat the soil around the base of the plant firmly.
Cut off any unnecessary leaves, including yellowing or brownish leaves, using a disinfected pruning shear.
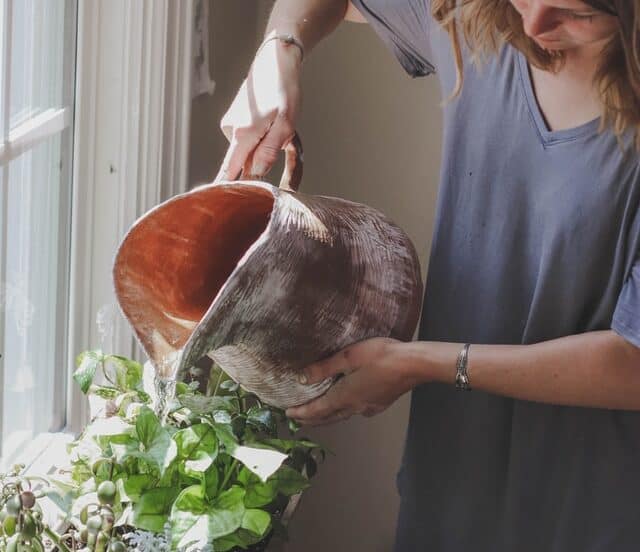
Step 6: Water the Plant
Thoroughly water the plant after repotting to give it a head start.
After a week, you can resume the previous watering schedule, allowing the topsoil to dry out ½ inch between watering.
Note: Do not fertilize your plant yet because the new potting mix already contains some nutrients and microbes essential for the repotted plant.
Bravo! You have successfully repotted your plant.
However, keep an eye out for any drastic change in your plant for few weeks. The repotted plant should start proliferating with weeks.
However, if you notice slowed growth or Schefflera leaves turning yellow, you should know that your plant suffers from transplant shock.
Tips to Take Care of a Repotted Schefflera Plant
Trimming the roots and repotting can be hard on a plant, especially when it is weak or damaged, requiring some time to recover.
Pay extra attention to the repotted plant for few weeks and avoid fertilizing until the plant has established.
Here are a few handy tips for caring for your repotted Schefflera plant.
1. Prevent Transplant Shock
Transplant shock is common with plants that were repotted incorrectly or handled harshly during the process.
It may cause plant stress, also known as transplant shock.
Here are few ways you can avoid transplant shock when repotting your plant.
- Repot the Schefflera plant only during spring when they are blooming.
- Avoid transplanting in fall or winter unless it suffers from grave diseases like root rot or severe nematode infestation.
- Use the same potting mix as before to avoid changes in soil type.
- Do not forget to moisten the root with water before changing the soil.
- Place the plant in the exact location before to ensure they get the same lighting condition and temperature.
- Although trimming is essential when repotting, ensure to handle them carefully. Do not shake, twist, or rough up roots, and use sharp pruning shear to cut thread roots.
Pro Tip: In case of a transplant shock, make a mild sugar and water mix and water the soil to help recover disturbing roots.
2. Provide Appropriate Watering
Thoroughly watering the plant after repotting is necessary to keep the soil moist.
The trimmed roots are active yet prone to damage from overwatering, so wait for a week before you water them again.
After a week, you can resume the usual watering schedule. Provide 1-1.5 liters of water once a week throughout the spring and summer.
Make sure the top ½ inches of soil dries out between watering, and do not forget to mist the leaves a few times a week during spring and summer to maintain appropriate humidity.
Use a pot saucer to collect excess water drained from the pot drainages and throw it away afterward.
Pro Tip: Limit watering during fall and winter to once every two weeks. Provide lesser than 1 liter of water, depending on the soil condition.
3. Provide Appropriate Lighting
Place the newly repotted plant in the same place to ensure it gets the same lighting condition as before.
Schefflera prefers bright indirect sunlight for at least four hours every day, so make sure to place them close to the light source in the room.
They can tolerate lower light conditions and direct sunlight, but they would not fare well with the plant leaves that quickly turn yellow.
Rotate your plant around once a month to keep it looking even on all sides.
Use grow lights such as fluorescent or LED lighting ranging from 15 to 25 watts to compensate on less sunny days.
4. Provide Appropriate Temperature
Schefflera thrives in warm temperatures with slight humidity, but it hates excess moisture.
Keep repotted plant at a suitable temperature to encourage new feeder roots and foliage growth.
Ensure that the temperature is between 65oF to 80oF during the day and around 60oF or above at night, despite the change in weather.
If you live in a region where the temperature drops below 50oF, it is better to use plant covers such as plastic sheets, drop cloths, and bedsheets to protect the plant from cold drafts.
Consider placing your plant in a shade when the temperature spikes over 80oF and mist your plant more frequently.
4. Provide an Appropriate Humidity level
Schefflera enjoys slightly humid conditions.
Keep the humidity levels slightly high, in the range of 65 to 80 percent, around the plant to make it look fresh after repotting.
Invest in a good air humidifier or install a few houseplants to boost the humidity inside the room naturally.
Alternatively, mist your plant leaves once in a while to increase the humidity, but make sure to wipe the leaves and stems of water to prevent fungus infestation.
5. Fertilizer the Plant
Wait at most six weeks before fertilizing your repotted plant.
The fresh potting mix should have enough macronutrients and trace minerals required for the root and foliage growth.
Once you start fertilizing, opt for organic liquid-based fertilizer like Miracle-Gro® Indoor Plant Food that has ideal Nitrogen, Phosphorus, and Potassium (NPK) ratio.
Alternatively, use a balanced liquid fertilizer like Monstera Plant Food with NPK 5-2-3 ratio for regular plant feeding.
6. Control Pests Problem
It is uncommon for freshly repotted plants to encounter pest problems until they are exposed to conditions that encourage pest infestation.
You can either use a homemade solution such as rubbing alcohol or soapy water or rely on appropriate pesticides to control pest problems.
However, here is the list of pests that may show up in your Schefflera.
| Pests | Problems |
|---|---|
| Aphids | Aphids suck out the Nitrogen for chlorophyll that causes yellow mottling leaves. |
| Yellow scale | They eat leaves and fruits, and heavy infestation may cause yellowing and dropping leaves. |
| Spider mites | They are common in outdoor plants during monsoon. Heavy infestation may cause yellow and brown spots on leaves. |
Pick and remove spider mites if the infestation is less severe. Wipe the plant with a homemade mixture of soapy water or rubbing alcohol to remove severe infestations.
Use the same method to remove early aphids and scale infestation.
If the infestation persists, consider using recommended pesticides to control aphids and scales in your Schefflera plant.
7. Control Fungus Diseases
A recently repotted plant may attract fungus if overwatered or placed in a damp, moist location. This may include root rot fungus or powdery mildew that appears on the leaves and stems.
Moving your plant to a warmer location may lessen the fungus growth.
For a more severe infestation, take it outdoors and give it a thorough wash with multi-purpose fungicide.
Alternatively, you can prepare a homemade fungicide by mixing two teaspoons of neem oil with one teaspoon of mild soapy mixed with a liter of water and spray onto infested plants.
8. Prune the Plant
Although you can trim the plant when it becomes crowded or scraggly, avoid trimming any part until a month before the plant recovers completely.
Prune only when necessary, so you can avoid trimming in spring and summer and resume trimming only in winter when the plant goes dormant.
Trim any areas that appear leggy, and ensure to cut just above the growth node.
Cut a leggy stem that lacks leaf growth. Trim it back to about six inches.
Next to go are old, dead leaves or stems.
Conclusion
Repotting a Schefflera plant is incredibly easy for seasoned as well as first-time gardeners, but it may take weeks before your plant starts showing any sign of growth!
Stay patient and follow the instructions mentioned above and tips to repot and care for your plant correctly.
Keeping a Schefflera plant in your home or office will help remove airborne contaminants such as benzene, formaldehyde, and toluene, thus, keeping your surroundings healthy and toxin-free.

