Pea gravel patio is sturdy and eco-friendly, with pros and cons to decorate your backyard with easier DIY steps.
However, an ill-prepared patio will dissipate or sink in a loose foundation, requiring frequent redo and expenses.
Therefore, read on to learn the pros and cons of a patio alongside easy, economical steps to create one.
Table of Contents Show
Is Pea Gravel Good for Patio?
Pea gravel is a nature-friendly, durable, affordable landscape material perfect for creating DIY patios.
For meager labor, pea gravel can turn your garden into an elegant Japanese Zen Garden.
Moreover, they are easy to maintain and require minimal site preparation beforehand, saving you time.
They are more durable than wood, cost less than tiles or stones, and are flexible to install or remove.
A layer of crushed pea gravel can maintain a patio surface’s normal wear and tear.
The small pea-sized gravel minimizes big air pockets, reducing frost damage probability.
Furthermore, rounded gravel leaves small gaps in the ground, letting moisture escape from beneath the surface.
A 100 sq. ft. pea gravel patio can become an achievable dream for under $150 unless hiring a licensed patio contractor, which may cost slightly more.
However, getting an expert will help save you from making costly mistakes with DIY projects.
How to Lay a Pea Gravel Patio?
Making a pea gravel patio is easy and quick when you have the right tools and techniques.
Here are some tools and materials you should gather beforehand.
| Tools | Purpose |
|---|---|
| Transfer Shovel | To transfer dirt, crushed stones, gravel etc |
| Garden Rake | Ideal for raking and removing debris from garden |
| Wheelbarrow | To carry dirt, stone, gravel etc. |
| Level | To level up the surface |
| Measuring Tape | To measure the layout |
| Pea Gravel (3/8 inch) | Makes perfect walkaways for the patio and controls weed |
| Crushed Rock (3/4 inch) (3/4 inch) or Gravel or Gravel | It will add stability to the top layer of pea gravel |
| Landscape Edging or Timber frame | To provide the solid border to edge weed or mow grass |
| Landscape Fabric and Stakes/Pins | It helps to keep mulches and unwanted debris like rocks from settling into the soil |
| Marking Spray Paint (Optional) | To provide the finishing touch to the patio |
Homeowners with minimal construction or remodeling knowledge can attempt a DIY.
Here is information to help you start an economical DIY pea gravel patio.
Pea Gravel Epoxy Patio
Here is the step-by-step process of creating a pea gravel patio.
1. Choosing a Location
Choose a relatively flat location so that the gravel won’t roll away. Also, consider the amount of rainfall the location receives.
Excess rain may drain through the gravel and sway away the small pieces.
Furthermore, heavy foot traffic areas can disturb and dispel small gravel. Thus, avoid pea gravel landscapes in the parkway and front yard.
A sunny area is more appropriate for a pea gravel patio to keep it warm and dry all the time.
Ensure the chosen location is suitable enough to install the landscape edging to keep the pea gravel in place.
2. Mark the Perimeter
Mark the perimeter square or rectangular using a measuring tape and marking spray.
Square up the frame by measuring between the diagonally opposed corners.
Remember, the more ample and profound the space, the more gravel you need.
Similarly, you should excavate the site to dig up 3 inches of soil. Anything less or more would create an inappropriate pea gravel bed.

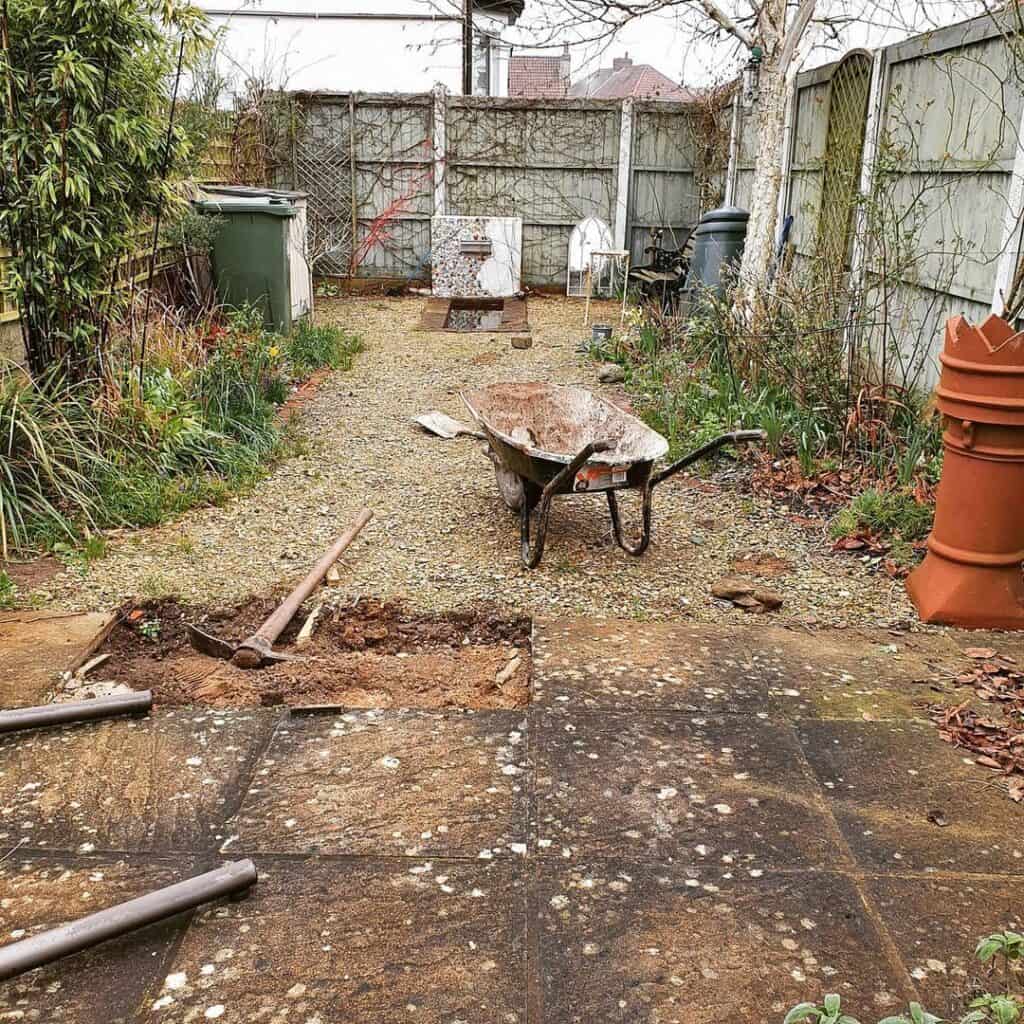
3. Remove Vegetation, Rock, and Debris
The next step is to excavate the area to remove all vegetation, soil, rocks, and debris.
You can cut away grass, roots, and vegetation using a hatchet or pickaxe.
Always keep a trowel to clear tiny sections such as corners and edges.
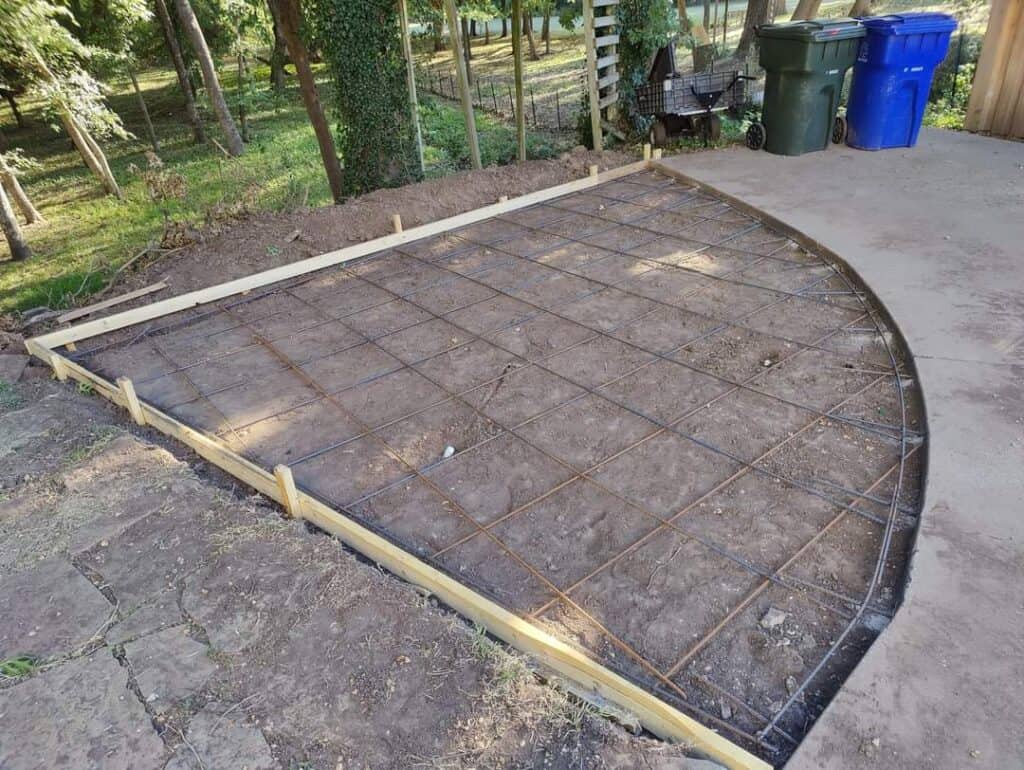
4. Tamp and Build the Foundation
Rake the soil using a garden rake to bring it to a level and tamp the ground by repeatedly walking over it.
Alternatively, you can use a hand tramp to compact the loose soil.
If you have loose or sandy soil, you will need a base layer to keep the gravel structure in its place.
You can use a level to measure whether the ground is flat.
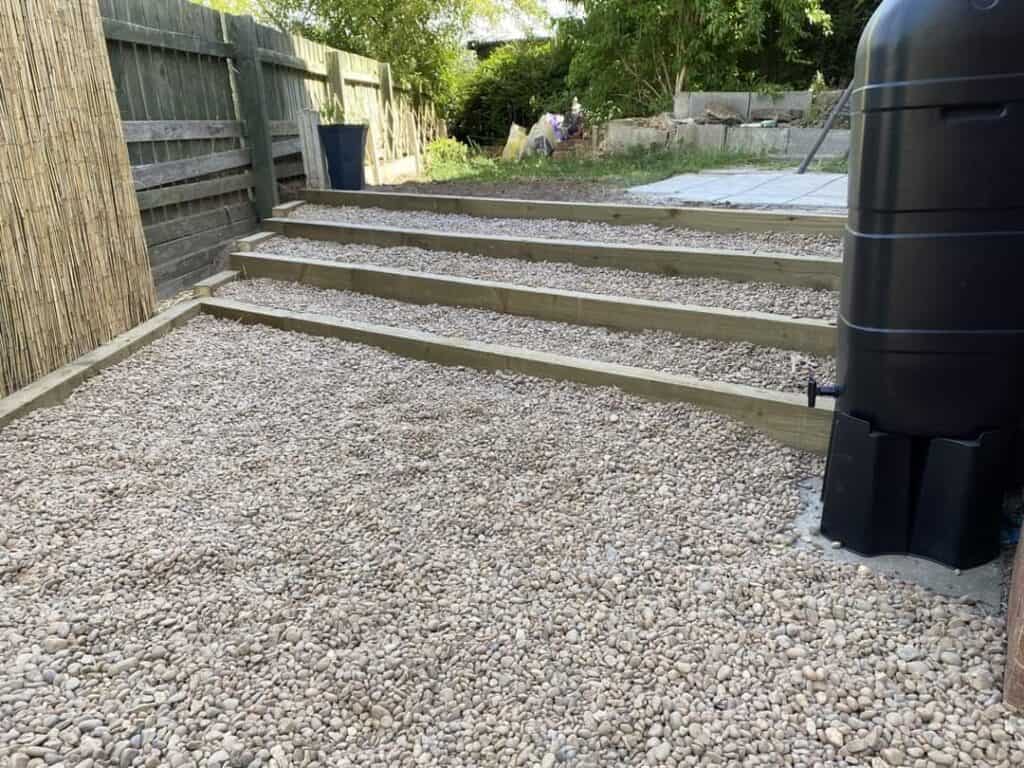
5. Layout and Secure Landscaping Edging
Secure the space by laying the landscape edging or timers to hold the gravel in space.
Depending on the patio’s size, you need eight to ten landscape timbers.
Overlap the timbers at the corners overlapping against each other’s butts to make a compact edge.
6. Install and Secure Landscape Fabric
Now, lay the landscape fabric to cover the entire patio area. It will keep the pea gravel from sliding into the ground.
Overlap each strip of fabric by four inches to create a border and secure the fabric using stakes or pins.
7. Add the Gravel
Lastly, cover the patio with pea gravel. Load up a wheelbarrow with pea gravel and toss it into the space.
Here is a simple formula to estimate the cubic yard of gravel: (Length x Breadth x Height) feet divided by 27.
Repeat filling each patio section and smooth out the gravel using a rake or trowel until the surface is flat.
Voila! Your pea gravel patio is ready to use. Now consider washing it with a garden hose to clean the surface.
Pea Gravel Patio: Pros and Cons
Pea gravel makes a perfect landscaping material offering multiple uses and benefits.
However, it is not a permanent fixture of any home. Also, the use of pea gravel patios has its distinct pros and cons.
Thus, let me shed some light on the pros and cons of a patio.
| Pea gravel patio Pros | Pea gravel patio Cons |
|---|---|
| It is cost-effective and gives exceptional results. | It requires a firm foundation, otherwise it may sink deeper. |
| It is low maintenance and easy to install. | It can be easily displaced. |
| It is customizable and easy to walk over. | It can be uncomfortable to walk over for bare foot. |
| It prevents weed growth. | It complicates snow removal and weed may regrow if not properly maintained. |
| It looks aesthetically pleasing and eco-friendly. | Gravels sharp edges may damage furniture. |
Pea Gravel Patio Pros
Here are some proven benefits of a pea gravel patio.
1. Cost-Effective with Exceptional Results
Pea gravel is the most cost-effective landscape material you can ever find.
Moreover, it costs almost nothing to maintain the patio.
So, a pea gravel patio would be the best choice to establish a lovely-looking patio on a budget.
2. Easy to Install and Low Maintenance
A Pea gravel patio is relatively easy to install and requires only a handful of tools and materials.
A novice could install a pea gravel patio by watching a YouTube tutorial. It’s that easy!
Doing it yourself project helps save costs on expert’s services.
3. Multiple Customizable Designs
Pea gravel is versatile; you can choose from varying sizes, textures, and colors.
However, a pea gravel patio is best when products smaller than 1/4 inch are used.
Similarly, you can choose gray, white, yellow, or beige gravel. Some may even appear translucent, giving them an other-worldly appearance.
4. Easy to Walk Over
It is easy to walk over, provided you wear comfortable shoes or slippers.
This process will speed up if you place binding oil with the product as it compresses to create a hard, flat surface.
5. Prevents Weed Growth
You can lay out pea gravel without worrying about flooding issues. Similarly, it also helps to control and prevents weed growth.
Pea gravel patio creates a thick, protective layer over the ground that keeps the moisture and sunlight away, preventing weed growth.
Moreover, it controls pest problems by removing vegetation from the ground likely to harbor pest eggs.
6. Natural-looking and Aesthetically Appealing
No wonder the pea gravel patio is entirely natural and equally aesthetic.
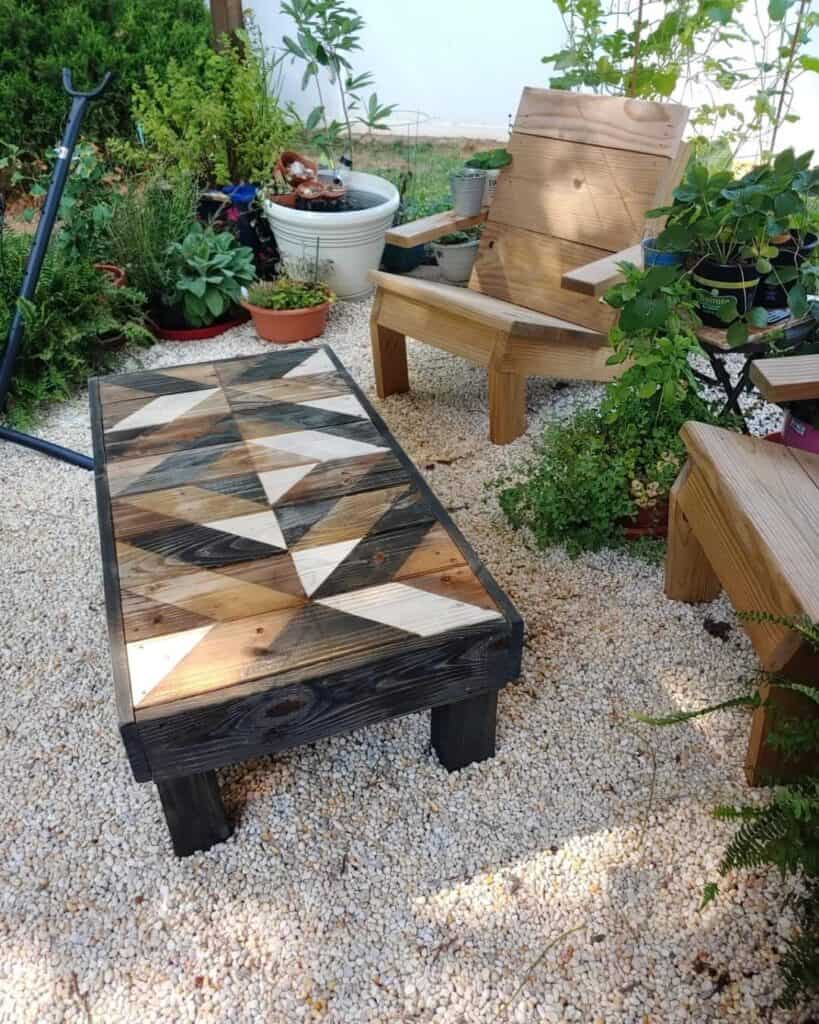
You can allow it to stand alone, fill the gaps between the pavers, and style it to accent the small corners, statues, or even houseplants.
It makes a perfect outdoor dining space to add luxury and style.
Similarly, you can lay it around the small pond to create a Zen-like environment.
7. It is Widely Available
The best thing about pea gravel is that they are widely available and easily accessible.
It is the same process as many communities use the local stones to resurface roads.
Pea Gravel Patio Cons
Although there were some benefits of pea gravel patio, here are some cons.
Here are some disadvantages of installing a pea gravel patio.
1. Easily Displaced
The biggest drawback of pea gravel products is that they would not stay in place, requiring barricading from all sides.
It can quickly dissipate and land in places where it should not be.
Moreover, different sections of the pea gravel patio will begin to sink when the gravel moves away from its place.
2. Requires a Firm Foundation
Establish a sturdy foundation when laying the pea gravel; otherwise, it will sink deeper into the ground.
Even if you create a layer 4-6 inches thick, you will find that footprint quickly dislodges large surface areas.
It would mostly happen when the foundation layer is torn out by the pea gravel, requiring removing all the gravel to lay a new foundation.
3. Uncomfortable for Barefoot
You cannot imagine walking barefoot on the pea gravel because the tiny edges will poke into your soles.
Although it provides a softer surface to walk on than other material types, walking barefoot is barely possible.
Small children who wander outside without shoes will become the primary victims of thorny pea gravels.
4. Damaging to Furniture
As you may imagine, Pea gravel does not work well with most furniture.
The weight of the furniture, especially the seated chair, and table, would cause the gravel to sink further into the soil.
Furthermore, the sharp edges may scratch the furniture’s legs.
You need at least a six-inch deep layer of pea gravel surface to make it appropriate for seating, such as dining or partying.
5. Complicates Snow Removal
Removing a thick pile of snow using a shovel from the pea gravel can be a headache.
Not only will you remove the snow, but also the top layer of pea gravel with it.
Your best bet is to remove as much snow with a shovel and then melt the rest using a leaf blower or salt.
6. Continues to Polish and Shape Over Time
Whether you like it or not, the pea gravel will continue to polish and shape itself.
You will be requiring refilling the pea gravel to keep the patio compact.
Otherwise, use a product like concrete exposed aggregate to reduce the gravel’s movement.
How to Maintain Pea Gravel Patio?
- Tidy the gravel surface with a rake once in a while to keep it level.
- Replenish the gravel every two to four years when it begins to thin out.
- Pick out food droppings and pet wastes from the gravel before it begins sinking underneath.
- Fill a spray bottle with diluted Pine-soil or other household cleaners, spray it over the gravel generously, and let it sit before thoroughly watering.
- Always keep an extra pea gravel batch in your garage or store it to replenish it.
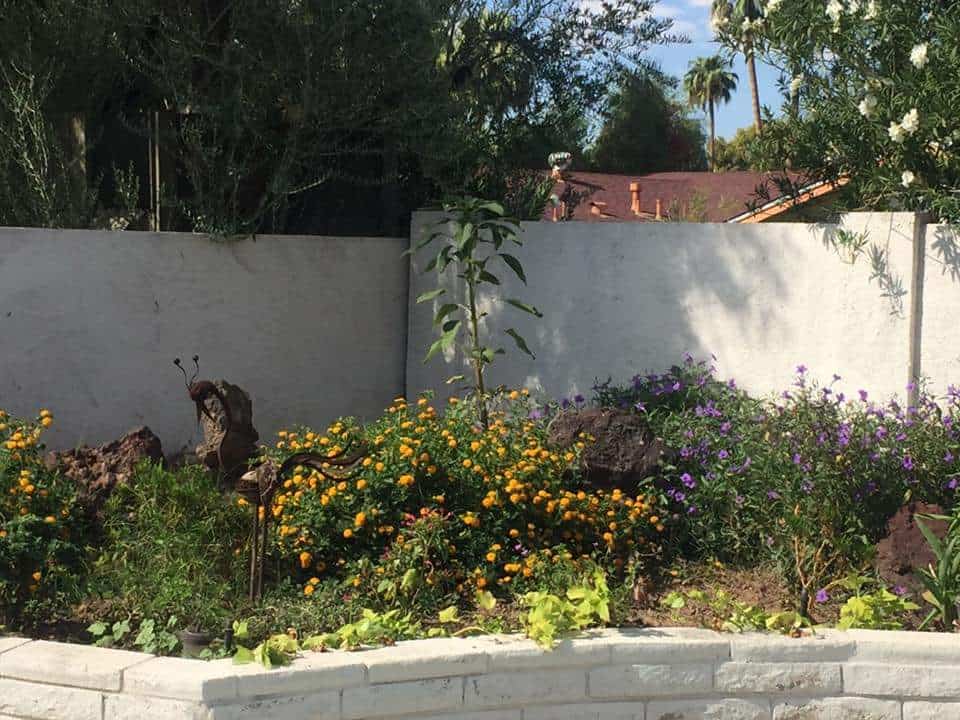
- Make a raised gardening bed alongside a pea gravel patio to decorate your backyard.
Call 8-1-1, the national “Call Before You Dig” hotline, to prevent driving stakes into the ground that may pierce electrical or plumbing lines.
Final Thought!
With proper care, create a mini-garden of your favorite houseplants over the economical pea gravel patio.
But weigh the patio’s pros and cons before digging up your backyard.
However, the pea gravel alternatives are crushed stone, beach pebbles, and decomposed granite.
2 comments
My twin brother wants to add a patio to his backyard so his family has a nice place to spend time together outside. Thank you for mentioning how pea gravel is the best choice for attractive and affordable patios because it is easily maintained. My brother is hoping to spend as little as he can on the patio, so I’ll have to suggest that he invest in pea gravel.
A Pea gravel patio can be an awesome choice for someone like your twin brother. Thank you for reading this, and please keep us updated.