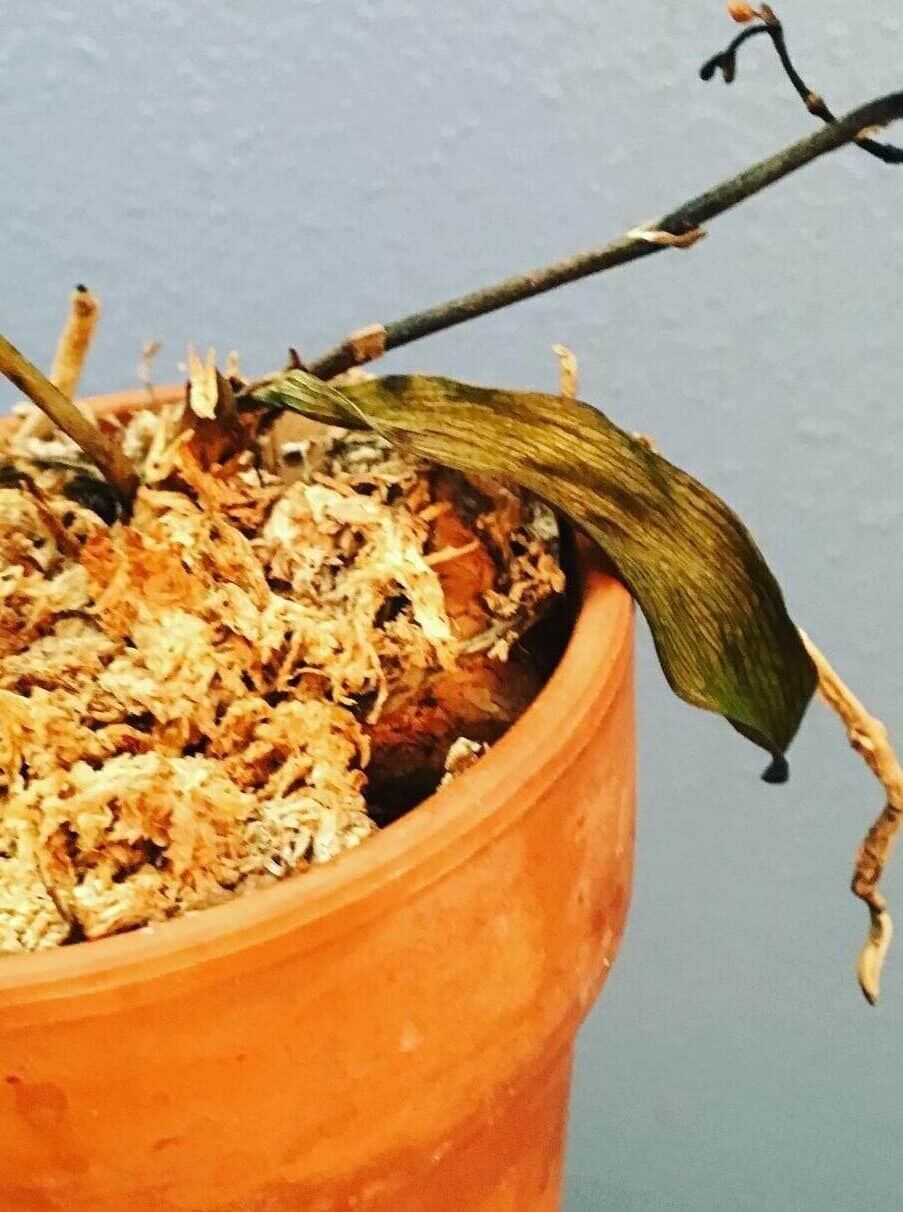
Most Orchids bloom once or twice a year and can last up to 120 days; however, seeing a withering Orchid is uncommon.
Dead or dormant Orchids often display shriveled stems, yellow leaves, stunted growth, and other problems.
While dormant Orchids can be revived with optimal care and maintenance, saving a dying plant may become overwhelming.
Read on to find out what kills your Orchid plant and how you can revive them before it is too late.
Table of Contents Show
How Do I Know if my Orchids are Dead?
The uneven care and inaccurate growing condition, such as overwatering, root rot, and too much light, will quickly kill the plant.

Look closely at a dying Orchid because it gives out signals that resemble a dormant plant.
Let’s dive deeper to find out whether your Orchids are dead.
1. Brown and Mushy Crown
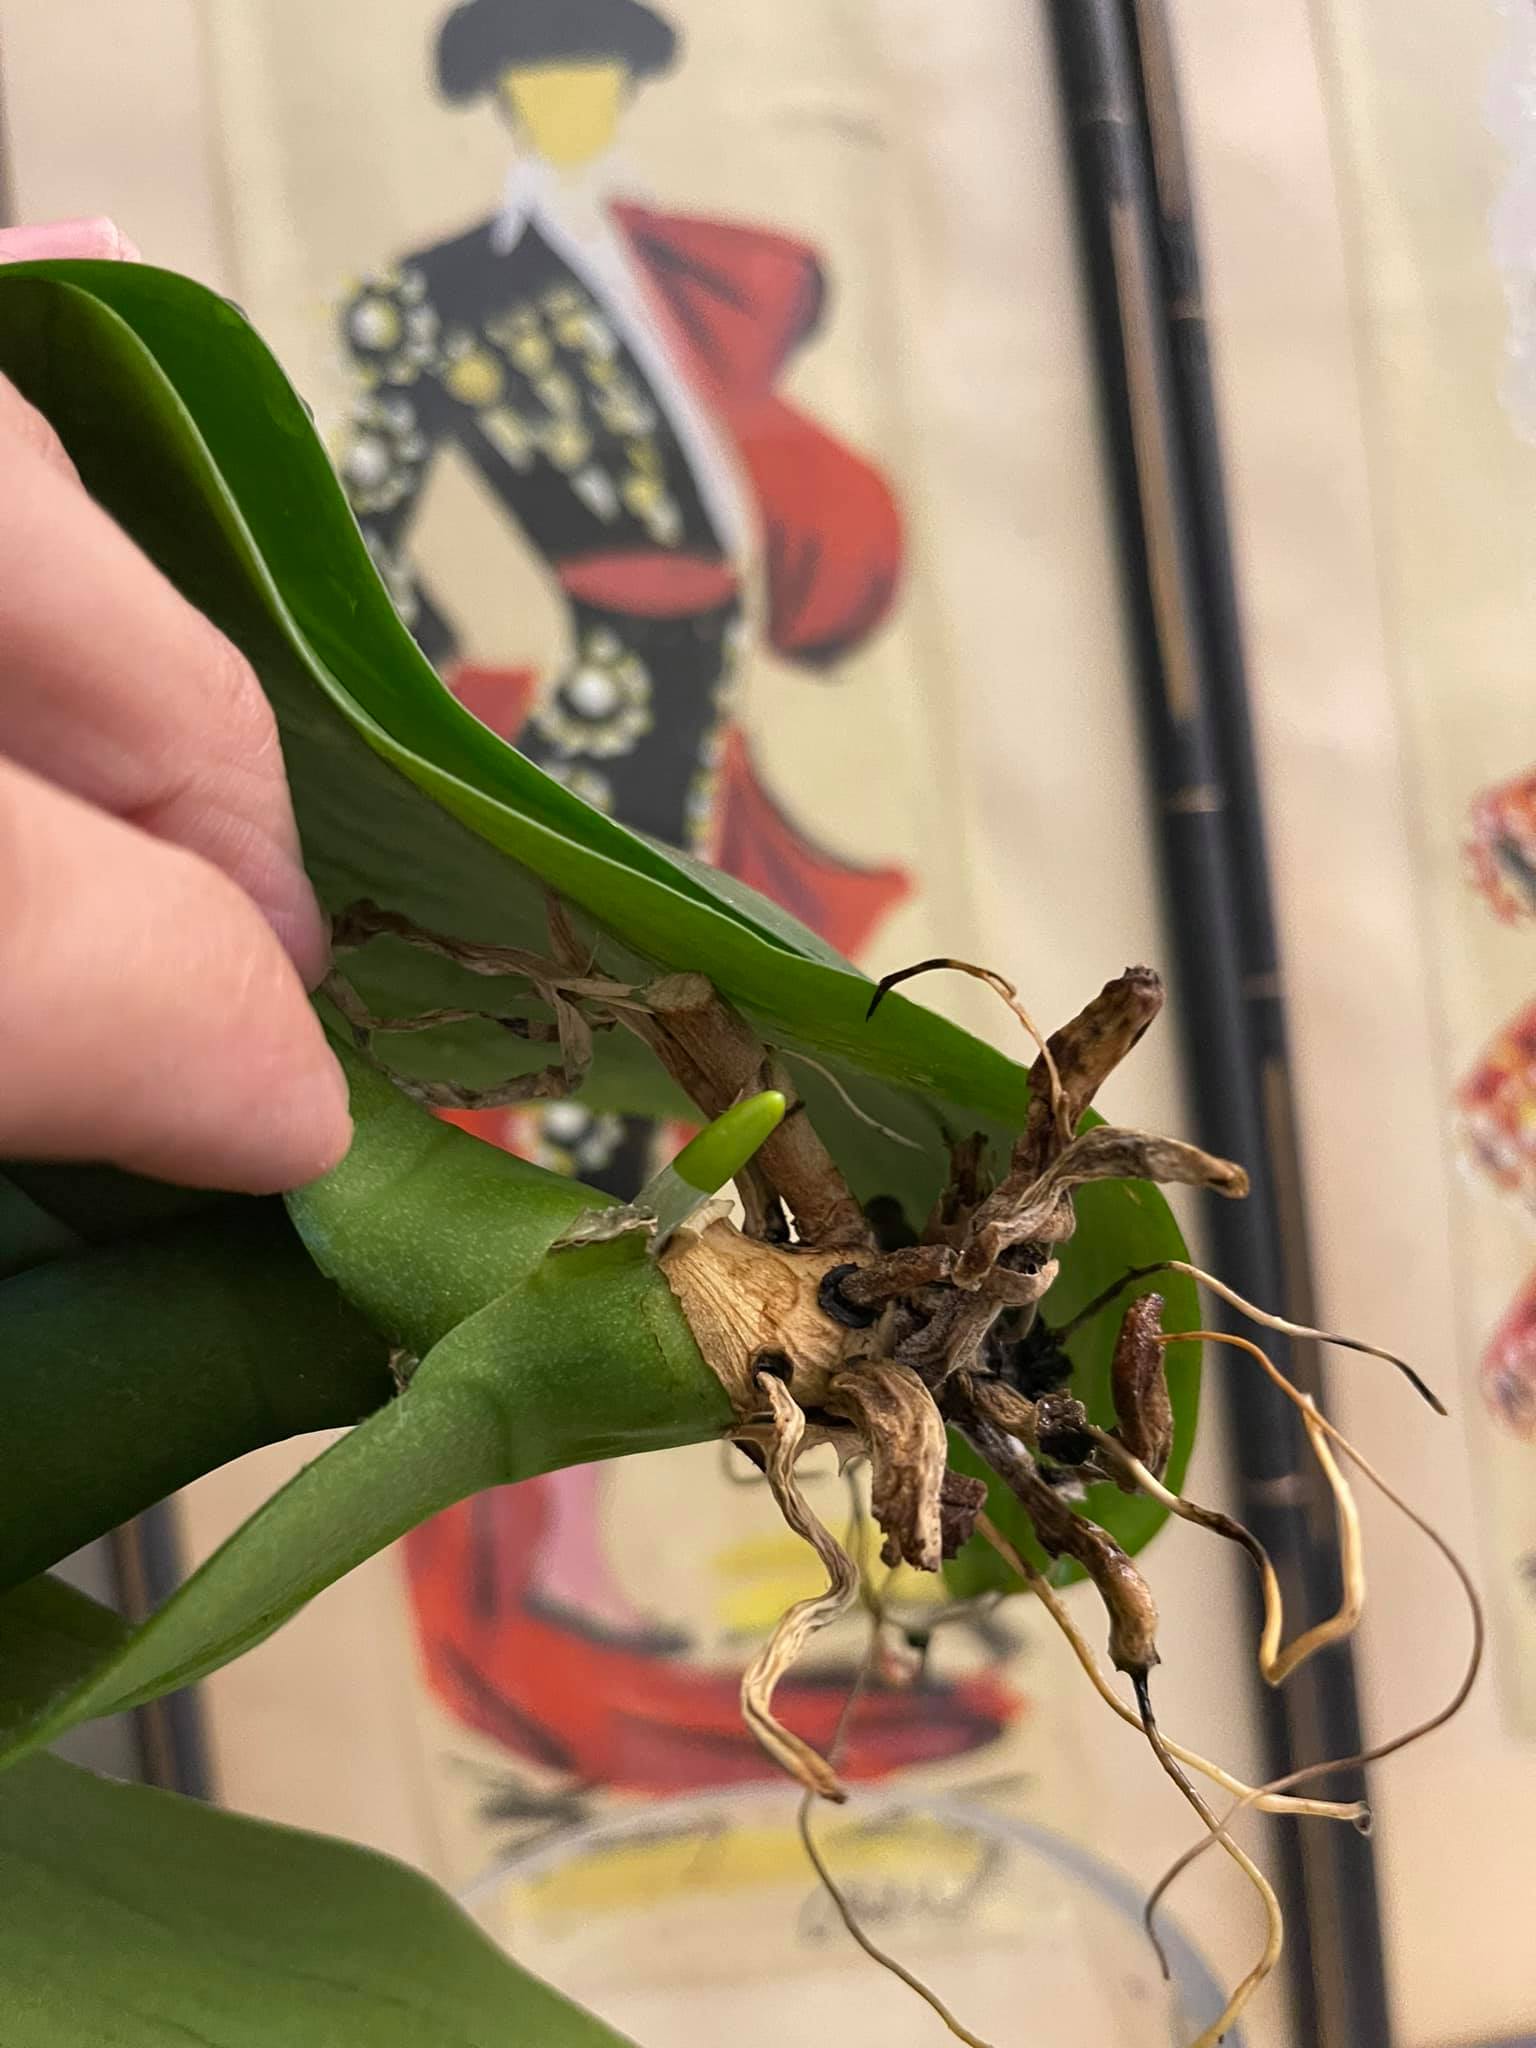
The brown and mushy crown connecting the leaves and root indicates a dying Orchid plant. It indicates the onset of fungal root rot, which has increased to a severe level.

Your only option is to salvage the healthy stems and dispose of the plant. You would know the crown is healthy and resting due to dormancy if it appears green underneath when you scratch the surface.
The brown or mushy crown is also symptomized by excessive yellow leaves at the bottom, stunted growth with floppy foliage, and failed blossoms.
Also, low-temperature lead to this problem, as orchids are warmth-loving plants that thrive at temperatures up to 75°F or more.
Practical Fixes
- Throw away the Orchid before the problem spreads to surrounding plants.
- Salvage any healthy-looking stem for propagation but treat with fungicide beforehand.
- Consider pruning and treating them with fungicide for slightly decayed roots before repotting in a fresh potting mix.
- Otherwise, pour certified fungicide mixed with water over the soil to kill the fungal infestation.
2. Significant Yellowed Leaves
The Orchids with a few yellowed leaves indicate that it is discarding the older leaves. However, the significant number of leaves turning yellow is a clear sign of distress.
The excessive yellowing of foliage usually occurs when the roots are decayed or severely stressed from excessive fertilization and overwatering.
The plant exposed to a too-sunny location will begin drying and change foliage color due to transpiration (water loss from leaves).
Some yellowing of bottom leaves is common even in dormancy, primarily caused by environmental factors.
Overwatering and too much lighting are the main culprits of root rot in Orchids, resulting in excessive yellowing foliage. The stressed roots fail to transport water or nutrients to the leaves.
Practical Fixes
- Start with removing completely yellowed leaves to redirect the energy towards healthy growth.
- Cut back on watering and only provide about 59 to 80ml or ¼ cups of water every seven days.
- Lessen the watering frequency once every 25 to 30 days in fall and winter.
- Move the plant a few feet away from direct sunlight, which is more prevalent in the south-facing windows.
- Keep the substrate moist for the feeder roots to adapt to the soil and avoid fertilizing immediately after repotting to avoid transplant shock.
3. Withered and Dropping Foliage
One of the indications of a dying Orchid plant is wrinkled or withered-looking leaves that later drop off.
It primarily occurs when the plant is deprived of moisture due to root rot or excessive sunlight.
If excessive yellowing is followed by dropping foliage, know that the death of the Orchid is imminent.
Similarly, the flower spikes begin wilting, dying and falling as it comes under immense stress to stay looking healthy.
Orchids will naturally shed leaves and replace them. Once you resume watering and lighting in early spring, the plant will rebloom with new leaves.
Practical Fixes
- Check soil condition by inserting your finger; it should feel slightly moist but crumbled or too wet.
- Following a strict water schedule would suffice once every 7-10 days in spring and summer.
- Overfertilizing the plant deposits salt layers on the soil, especially with synthetic fertilizer. Consider running water through the pot 2-3 times to leach out excess chemicals.
- However, remember to dilute the solution to half-strength by mixing it with water before applying it.
4. Skipped Blooming
An Orchid under immense stress will skip blooming to conserve its energy.
Remember, Orchids will only produce flowers when they get an environment of their liking.
Therefore, it is rare to see Orchids skipping the blooming season entirely. Too much light, excess fertilization, and bacterial growth must be blamed.
Expect the plant not to blossom in fall and winter when the Orchid goes into dormancy.
However, it is not too late to revive it. Move it to the correct potting soil and the proper growing environment.
Practical Fixes
- Orchids skip blooms due to exposure to insufficient sunlight, so provide them with 6-8 hours of bright, indirect sunlight.
- Use only organic fertilizers like Burpee and Feather meal with an NPK ratio of 20-20-20 and keep the frequency every two months in spring and summer.
- Consider using a well-draining potting mix containing bark fines, perlite, and peat moss.
- Pests invasion can also skip the blooming, so apply Neem or horticultural oil all over the plant to neutralize problems immediately.
5. Dark Spots and Bleaching on the Leaves
Orchid leaves with dark spots and bleaching indicate severe fungal disease or pest infestation.
Bleaching of green foliage is uncommon owing to problems such as fungal disease, pest infestation, and overexposure to sunlight.
The lack of chlorophyll production leads to excessive bleaching of leaves, causing the untimely death of the plant.
On the other hand, dark spots may appear due to severe pest infestation and direct sunlight.
Check the root condition and the number of green leaves to determine whether your plant is salvageable. You can save the plant if most leaves are intact and look healthy and green.
Practical Fixes
- Start with moving the plant to a shady location.
- Alternatively, organic pesticides can kill all kinds of pests and eggs.
- Slide the plant out and check for decayed roots if the problem does not subside.
- Prune the infected roots and apply some fungicide before transplanting in a fresh potting mix.
What does a Dormant Orchid Look Like?
Due to dormancy, Orchids may take some time to rebloom after a cold winter. Generally, they should give out young leaves in spring and blossoms by mid-spring.

Please know that your Orchid suffers from cold stress if it fails to exhibit new growth even in the growing season.
Find out whether it has survived the cold by scratching the stem to locate the green and fleshy underneath in spring.
You can further diagnose the problem by uprooting the plant to check the roots.
Unlike other houseplants, Orchid experiences a long dormancy period, six to nine months at a stretch.
Once the dormancy is over, the Orchid may rebloom on its own, usually in late spring or summer.
Continue watering your resting Orchid the same as you usually rejuvenate the root system and fertilize it early spring to provide a sufficient boost.
In addition, provide ample indirect sunlight to induce the photosynthesis process as soon as the winter passes, and your plant will regrow in no time.
How to Take Care of Dormant Orchids?
When an Orchid goes into dormancy, you need not do much but provide primary winter care to keep it safe from adverse cold conditions.
1. Provide ample light: Dormant Orchid craves warmth and light even in winter; therefore, try keeping them near a light source such as an LED grow light or sunlit window.
2. Provide Cold Protection: Orchids that are not cold-hardy will suffer in low temperatures; therefore, cover them with a frost blanket and use a heat mat when the temperature drops significantly.
3. Halt Fertilization: Stop fertilizing the plant once it hits dormancy but ensure to add plant food in late winter to boost blossom growth as soon as it gets into spring.
4. Remove Spent Growth: Remove all the Orchid flowers, spent or healthy, in dormancy, including yellowed and brown leaves to conserve the energy inside the plant.
5. Water Sparingly: Water your Orchid sparingly in dormancy as it fails to retain too much moisture. Lay a few ice cubes over the soil every 2-3 weeks.
To induce the dormancy period in Orchid, lower the temperature, reduce watering and fertilization, and continue the care routine as you would in their dormant period.
Preparing an Orchid Bush for Winter
All Orchid plants go into dormancy in winter, indicated by low water retention, no root growth, and zero blossoms. However, not all Orchids hibernate the same way during winter.
Depending on the Orchid species, cold hardy ones (Miltoniopsis and Dendrobium Nobile hybrids) will be better suited to keep outside.
On the other hand, warm growing Orchids (Vandas and Catasetums) will go inside with proper insulation throughout the winter.
Here are a few proven ways to prepare your orchids for winter.
- Shed down the plant significantly before dormancy, including pruning decayed flowers, stems, and unhealthy roots.
- Before the plant goes dormant, deadhead brown or dry blooms stop the plant from focusing energy on producing unsuccessful blooms.
- Prepare a rack with wood stakes or plastic to place the Orchids outside.
- For indoor kept Orchids, create a grow tent with wood sticks and wrapped chicken wire for support.
- Fill the wire with mulch, pine, and leaves for natural insulation.
- If you live in a colder region, consider moving your warmth-loving orchid inside and use an insulation blanket or heating mat to prevent the risk of cold drafts.
- Remove the insulation once the last frost passes in early spring and reintroduce it to its original location.
From Editorial Team
In conclusion!
Dying and dormant orchids look the same but differ, so you must differentiate them by the above-mentioned symptoms.
Use a potting mix containing coco pits, perlite, sphagnum moss, and sterilized garden soil in a ratio of 4:1:1:1.
Remember to prune the deadhead flowers in the fall and prepare for winter to witness healthy blossoms again next year.


