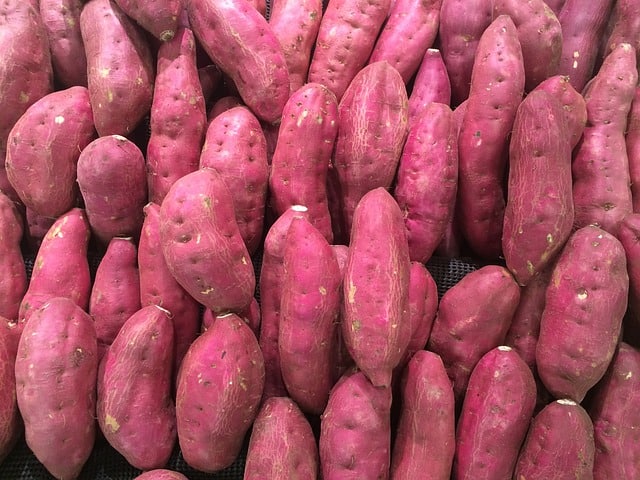
What could be a sustainable way to use a sprouted sweet potato other than discarding them? Well, grow sweet potatoes indoors!
Plant these tubers in a container to get wholesome sweet potatoes you and your family can enjoy around the year.
Whether you are a beginner or a seasoned gardener, follow along to learn how to grow Sweet Potato vine indoors in just a few easy steps and tricks.
Table of Contents Show
Can you Grow Sweet Potatoes Indoors?
The straight answer to the possibility of growing sweet potatoes indoors is a YES, via its slips. Slips are the sprouts or shoots from the potato tubers with no roots.
Most importantly, you would need to sprout your slips before planting them. Or, simply order the fresh slip online.
Remember that these tubers are technically outdoor plants growing from Zone 9 to Zone 11. Thus, they need a sunny outdoor location with at least 6-8 hours of full sunlight to grow.

Further, choose a bush variety of sweet potatoes indoors that can quickly grow in a limited space.
But when grown outdoors, you can pair it with Potato companion plants like Garlic and herbs like Basil and Thyme.
Quick Tip: You can quickly “Sprout” slips by placing each tuber submerged into a glass of water until the slips (green vines) start sprouting within a few weeks.
Benefits to Grow Sweet Potatoes Indoors
Growing sweet potatoes indoors has an advantage over those grown outdoors.
- Maintained temperature: Sweet potatoes grown indoors can easily be kept warm at all times for proper growth.
- Prevents cold anomalies: Slips grown in the container are protected from cold drafts that appear at night. The yield of indoor sweet potatoes is safe from the early frost of the later season.
- Protection from Pests and Diseases: It also protects them from potential pests, diseases, and fungi, including;
| Pests | Detail |
|---|---|
| Alternia Leaf Spot | Fungus infestation that creates brown lesions on the leaves |
| Fusarium Rot | Fungus infestation leading to the swollen and distorted base of stems |
| Bacterial wilt | Bacterial infection that infects healthy sprouts |
| Sweet Potato Stem Borer | A larvae pest that feeds at the crown region of the crop |
- Contain the Massive Size: Growing in a container will help contain the massive size of otherwise growing vines without damaging the yields.
Sweet Potato Varieties to Grow Indoors
You can find over 6,000 varieties of sweet potatoes, but not all are ideal for growing indoors.
Here is the list of five sweet potato varieties best for growing indoors.
1. Beaureguard
The quality of Beaureguard to adapt well even in poor soil makes it one of the popular choices.
You will usually find these orange-fleshed sweet potatoes dominating the shelves in the supermarket.
Most farmers choose Beaureguard because it is highly resistant to white grub, a plant-eating scarab beetle, and fusarium wilt.
2. Jewel
Jewel is considered the Queen of sweet potatoes because it is used in many recipes. The flavor enhances, especially when baked to perfection.
These tubers are short and sweet compared to other varieties; thus, perfect for growing indoors.
You can expect to be highly rewarded if you wait longer because it may take over 120 days to mature.
3. Bush Porto Rico
Also known as “Bunch,” this vineless tuber gives big yields, and many feel the tastes resembling yams and pumpkins.
The compact size of these sweet potatoes can conveniently grow indoors. However, it may take well over 110 days to mature.
On maturity, the red outer skin turns pale. That is when you harvest and enjoy the delicacy.
4. Centennial
You would mostly find them in the restaurant served as fries. It has a carrot-like color inside and orange skin.
Popularly known as “Baby Baers,” this variety reaches maturity in about 90 days and is best for short-season areas.
5. Covington
Covington is a medium-sized grower with short vines ideal for indoor rooting and matures in about 110 days.
This orange-fleshed tuber is mainly eaten either roasted or mashed.
Favorable Condition to Grow Sweet Potatoes Indoors
Let’s look at a quick summary of the good conditions required to grow sweet potatoes indoors.
| Parameters | Favorable Condition |
|---|---|
| Soil pH | 5.6 to 6.5 |
| Soil Type | Well drained, Sandy Loam, Loamy Sand, Sandy Clay Loam |
| Soil Temperature | 60°F or above |
| Air Temperature | 75°F to 95°F |
| Fertilizer Ratio (N-P-K) | 5-10-10 or 8-24-24 |
| Irrigation | 1 inch of water every week (Water for two months, but cut back a month before harvesting) |
| Harvesting | 90 to 130 Days (Depending on the variety) |
| Pest Information | Foliar Feeding Insects, Wireworms, Fusarium root rot |
| Climatic Condition | Sweet Potatoes enjoy warm conditions (spring and summer) |
Indoor Localities for Growing Sweet Potatoes
There is no doubt that sweet potatoes grown outdoors have a more favorable growing conditions and yield more, but you can expect a good yield with the right conditions inside the home.
So keep it in mind when choosing an indoor location.
1. Near the Window
Choosing a well-lit area is essential for both the sprouting and rooting process.
Once you root the sprouts in a soil container, place it in an area that receives at least 6-8 hours of continuous sunlight, such as near the window.
Meanwhile, place the container on a raised deck or wall to avoid cold drafts from below.
2. On the Terrace or Patio
A terrace or patio is a great location to place your sweet potato container because it will receive endless sunlight.
However, insulating your tubers with black fabric prevents them from dropping temperatures.
It is recommended to grow them on a terrace or patio only when the danger of frost has passed.
Unlike the Potatoes in Zone 7, Sweet Potato on the terrace does not work well in cooler areas from Zone 8 and below.
Best Container for Growing Sweet Potatoes Indoor
An appropriately sized container allows the slips to absorb moisture and nutrients more efficiently.
But anything from a bucket and grow bags to pots with adequate drainage holes will work.
Alternatively, you can use totes or plastic and clay containers around the house that are big enough to hold 10 gallons of soil.
Otherwise, you can purchase inexpensive grow bags and smart pots online.
| Name | Size | Image |
|---|---|---|
| Gardzen 20-Pack 10 Gallon Grow Bags | 10 gallon |  |
| OPPOLIFE 6-Pack 10 Gallon Potato Grow Bags | 10 gallon |  |
| GORDITA Potato-Grow-Bags | 10 x 2 gallon |  |
| Rouffiel Potato Grow Bags with Harvest Window | 10 x 2 gallon |  |
| Sunnydaze Rustic Villa Fiber Clay Planter | 5 gallon |  |
Growing Sweet Potatoes Indoor
Here is the step-by-step guide to sprouting, rooting, and caring for sweet potatoes at home.
1. Start and Root the Slips
The easiest way would be to get the slips online or from the market without any sprouting hassles.
Look out for unblemished slips that measure 1½ inches in diameter with sprouts on them. And if the market-bought slip fails to meet the requirement, starting the slip yourself always saves.
To start your slips indoors, you need healthy and clean sweet potatoes. Depending on the variety, one sweet potato will produce about 3-5 slips.
- Carefully wash your sweet potatoes and cut them in half.
- Use a toothpick to partially submerge each piece in a glass or jar of water.
- Change the water in the glass every week with fresh water.
- Place them on a window ledge or sill to get enough warmth.
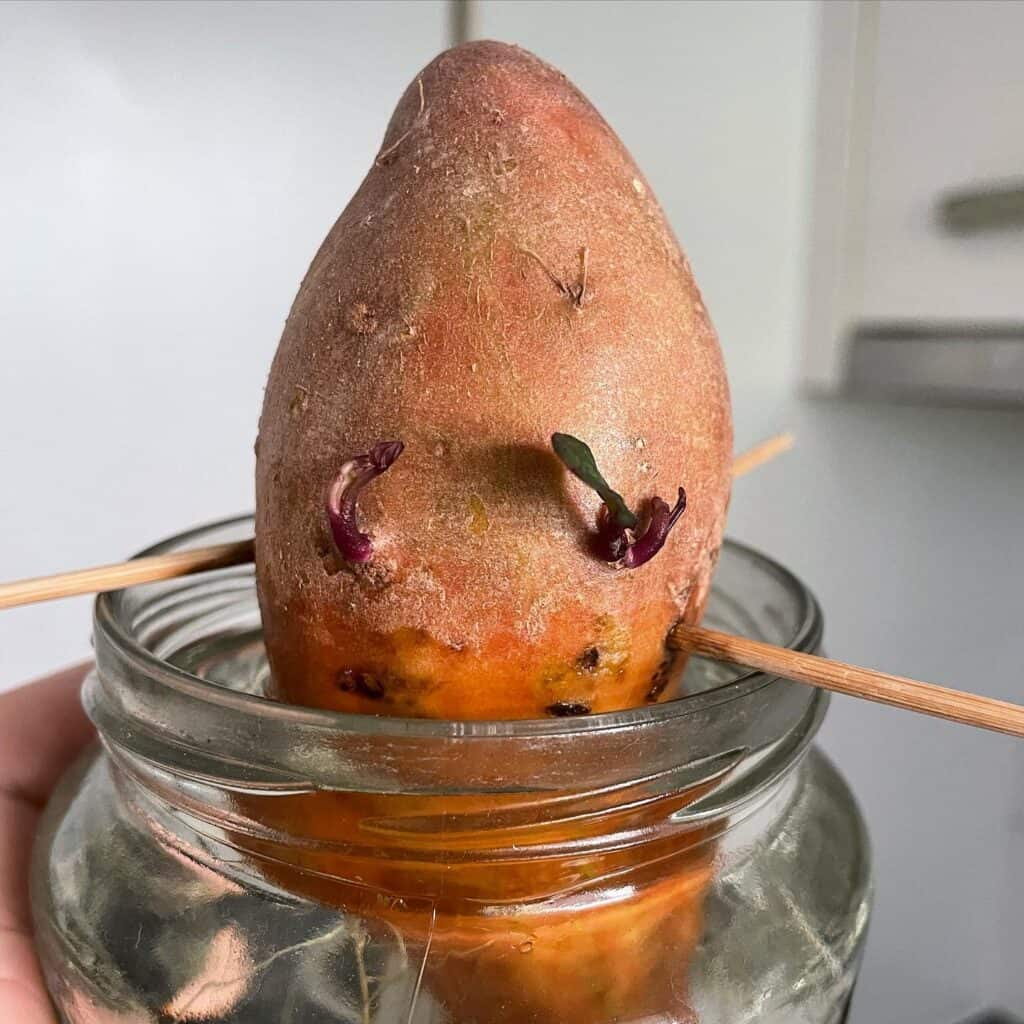
Tiny roots appear on the slips after 3-4 weeks, followed by leafy growth from the top.
Further, separate the sprouts into plantable slips by carefully holding onto each sprout and twisting it off. Root them in water, and they are ready to be planted after the roots attain an inch long.
Sometimes, it becomes difficult to tell the sprouting end from the root end.
Look for tiny reddish buds to find the root end; otherwise, leave them in a warm place for a few days before the reddish buds start emerging.
Note: Avoid using supermarket-bought sweet potatoes to start slips because they are often sprayed with a “BudNip” chemical that stops slips from sprouting.
2. Prepare the Potting Mix
Sweet potatoes are happy and proliferate in well-draining fertile soil. Several commercial mixes, highly porous and amended with compost, sand, and high potassium content, are available in the market.
Or simply curate the desired mix by incorporating equal parts of the sand and loam with one part of organic compost into two parts of the soil.
Moreover, the potting mixture amount depends on the container’s size. For instance, 10 gallons of container will fit up to 1.4 cubic feet of soil.
Excessive organic fertilizer can increase soil acidity, so balance the same by adding garden limestone.
Further, cover the soil with clear plastic and secure the edges with bricks or wood.
3. Plant the Slips
The next step is to plant the slips into the potting mix.
- Dig small 4-5 holes using the trawler into the soil to fit your slips.
- Place the sweet potato slips 2-3″ (5-7 cm) deep into the pot while the”top half (leafy part) is above the ground.

- Do not overcrowd the slips and ensure not to bruise them when planting. Plant each slip at least 10″ apart to encourage large yields.
- Press the dirt around the plant to set it in place and remove any air pockets.
4. Water Your Slips
New slips require watering every day for the first week and every other day for the second week, around 1 inch of water a week, and so on until you do it only once a week.
Do not worry about waterlogging because the drainage holes will release excess water. But only thoroughly soak your slip until all the potting mix is wet.
Cut back on watering before harvesting, for instance, after two months for a sweet potato maturing in 90 days.
For those left on the patio or terrace, use black plastic or fabric to cover the container whenever the temperature drops or heavy rainfall is on the radar.
Tips to Grow Healthy Sweet Potatoes Indoors
- Choose a fertilizer rich in potassium and phosphate with lesser nitrogen for your sweet potato slips.
- Start fertilizing the slips after 4-6 weeks of planting, but cut back immediately about a month before being harvested.
- Water your slips in the morning to let the excess water evaporate from the soil gradually throughout the day.
- Always use a non-metal container to grow sweet potatoes. Clay pots, grow bags, and smart pots are good choices.
- Make sure the soil temperature is at least 80℉ before planting the slips. Warm the soil quickly by placing it in the sun covered with shredded bark or leaves.
- Ensure the day and nighttime temperature does not drop below 60℉.
- If the current container seems smaller for the growing slips, consider transplanting each slip into a separate container using the same potting mix.
Harvesting Sweet Potatoes from Indoor Containers
Sweet potatoes are ready to harvest after 90 days, while some varieties may take longer to mature, even up to 120 days.
Once you see the foliage of the sweet potato turning yellow, it is better to harvest it without waiting for the maturity days to end.
For that, dig up the yields using a fork or trowel but do it gently to avoid damaging them. Even minor damage could lead to spoilage.
Use your hands to pull them out or dump the container upside down to harvest them without damage.
Each slip could produce at least one pound or 3-5 tubers, but it may also depend on the variety.
Note: If you planted your sweet potatoes a bit late, it is better to harvest them before the onset of the first heavy frost.
Tips to Cure the Sweet Potatoes
Upon harvesting, the yields must be cured before you can consume them. Sweet potatoes could survive winter if adequate precautions are followed during harvesting and storage.
- Leave the newly dug sweet potatoes to dry in the sun and air for a few hours.
- Next, store them inside a dry box in a cool place with good air circulation for a few weeks.
- Once cured, brush off the remaining dirt, pack them in paper cartons, or wrap them in a newspaper.
- Store your sweet potatoes in a dry cellar or pantry with at least 75 to 80 % humidity and 55 to 60°F to prevent drying.
Quick Tip: Don’t store them in the refrigerator for more than a few days because they are vulnerable to cold damage.
From Editorial Team
Conclusion!
Growing sweet potatoes indoors will save you a lot of outdoor space while giving you control over the crop.
The only thing to look after is its temperature and minimal care.