Anthurium clarinervium, commonly known as Cardboard Anthurium in its native Mexico, is an easy-to-care plant.
But, in unfavorable environments, it shows yellowing and browning symptoms.
Table of Contents Show
Overview of Anthurium Clarinervium
Anthurium clarinervium is a lithophyte or an epipetric plant that grows on the rocky landscape of Mexico.

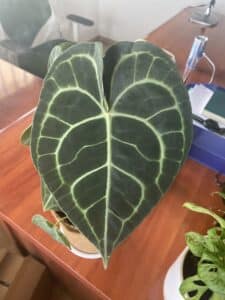
The plant is highly adorned for its beautiful cardboard-like stiff heart-shaped dark green foliage.
Here is some additional information about Anthurium clarinervium.
| Indicator | Identity |
|---|---|
| Scientific Name | Anthurium clarinervium |
| Common Name | Velvet Cardboard Anthurium |
| Native | Southern Mexico |
| Family | Araceae |
| Growth Zone | USDA zones 9-11 |
| Plant Type | Evergreen Perennial tropical Plant |
| Growth Size | 15-25 inches |
| Spread | 15-40 inches |
| Grown For | Foliage |
| Toxicity | Toxic to Human and Pets |
| Watering | Once a week in summer Twice or thrice a month in winter |
| Soil Type | Porous, Chunky and Nutrient rich. Soil pH 5.5-6.5 |
Where to Buy Anthurium Clarinervium?
Let me alert you that not all the stores and nurseries might have Anthurium clarinervium as it is not among the common houseplants.
Here is a list of online stores, nurseries, and retailers where you can get Anthurium clarinervium.
| Places to Buy | Delivery Service |
|---|---|
| Aroidsale | The product will reach within 7-8 days to your destination |
| OrchidBox | Within 2-3 days |
| Botanica | Generally within 4 days |
| Carnivero | Shipment within 3 days after an order is placed |
How to Care for Anthurium Clarinervium?
Tropical plants are not that easy to care for, and maintaining a conducive environment is the toughest task you have to deal with.
Most of our indoor environments do not meet their natural growing environment. Therefore, you might need extra effort to gain fruitful aftermath.
1. Sunlight & Temperature
Providing them with 8-10 hours of bright filtered light with a temperature of 60-80°F is sufficient.
Also, you can provide them with a few hours of morning sunlight and afternoon shade.
The plants show stunted growth, drooping, curling, and wilting symptoms if they can’t get sufficient light.
Also, the symptoms are similar for plants vulnerable to low temperatures.
However, overexposure to sunlight results in browning, crispy leaves, discoloration of foliage, and dropping leaves.
Tips to Maintain Adequate Light & Temperature
- You can place the plant near windows or patios that reflect morning and afternoon sunlight.
- As winter’s light intensity is low, you can keep them outdoors during the day. However, remember to bring them back indoors at night.
- If your space does not support sufficient light, introduce the plant to grow lights. You can provide them with 7-9 hours of L.E.D. Lights.
- To prevent cold, you can cover the plant with transparent plastic or a frost blanket.
- Avoid keeping your plant in a sunny location in summer and mist the plant frequently.
2. Watering & Humidity
Generally, it is ideal watering your Anthurium clarinervium once a week in summer and twice or thrice a month in winter.
You should never leave them in a pool of water. When the plant is overwatered, it invites bacterial and fungal growth to the soil.
Similarly, overwatering causes root rot. As a result, the plant starts drooping, limping, yellowing, and wilting.
In contrast, underwatering too is a major problem for Anthurium clarinervium. When the plants remain subject to drought for a prolonged period, their leaves turn brown, dry, and crispy.
Low humidity in them causes browning and curling of foliage. Low humidity also increases the transpiration rate; hence the plant might get stressed.
Tips to Maintain Proper Watering & Humidity
- Consider watering after the top 2-inches of soil dries out. Insert your finger 1/2 inch into the soil; water only if the soil feels dry.
- Reduce the watering frequency to half during winter or use room temperature or tepid water for watering your Anthurium.
- Misting your entire plant in the early hour of the day, be careful to overdo it, though, as it can cause your plant to suffer from the disease.
- You can place a tray of pebbles below the pot. It helps to increase humidity as the water in the tray evaporates or use an electric humidifier.
- Remove the plant from the pot. If the roots are mushy and soft, the root has undergone rot.
3. Soil & Fertilization
The best soil mix for your Anthurium clarinervium is porous, well-draining, chunky, well-aerated, nutrient-rich, and slightly acidic soil. I advise you to maintain a pH range between 5.5 to 6.5.
Here are a few commercial mixes that you can use for your Anthurium.
- Miracle-Gro potting Mix
- Sun Bulb 5011 Better-Gro Phalaenopsis Mix
- Espoma AP8 8-Quart Organic Potting Mix
- Dr. Earth Pot of Gold All-Purpose Potting Soil
Alternatively, you can make your potting mix using orchid bark, sphagnum moss, perlite, coarse sand, and organic compost in a ratio of 1:1:1:1/2:1/2.
Moreover, the amount of nutrition you put in is directly proportional to the growing size and health of the plant.
It is ideal for fertilizing your plants every two months in the growing season and once in the rest of the season.
For your plants, it is best to use organic compost like bone meal, worm casting, manure, chicken litter, etc. Alternatively, you can use synthetic NPK fertilizer in the ratio of 5-10-5.
Here are some of the commercial fertilizers you can use for Anthurium clarinervium.
- Espoma BM10 Organic Traditions Bone Meal 4-12-0
- Indoor Plant Food by E Z-GRO 15-30-15 (P.T.)
- Down to Earth Organic Bone Meal Fertilizer
- Jobe’s Organics 09524 Purpose Granular Fertilizer
4. Regular Pruning
Pruning back your Anthurium clarinervium helps to keep them neat and encourages bushier foliage.
You can primarily prune back your Anthurium clarinervium once in 1-2 years during fall or the end of the summer.
Timely pruning of old, dead foliage, flowers, and buds will encourage thicker foliage.
Mealybugs, Aphids, Scales, Spider Mites, Colletotrichum gloesporoides, and Xanthomonas axonopodis are some pests and pathogens alarming the growth of Anthurium.
Practical Solutions
- Put on safety goggles and gloves, and makes it seem as if the plant is toxic.
- Prune only dead and discolored foliage, buds, flowers, and stems with decontaminated tools.
- Ensure to prune off damaged leaves, flower buds, and specific branches.
- Avoid pruning more than 20% of the plant, as the shock might affect the plant negatively.
- Using fungicides containing copper, mancozeb, or thiophanate methyl, you can control fungi and bacteria.
- You can knock off pests with isopropyl alcohol. Use a cotton ball dipped in the alcohol and ran it along the infected surface.
5. Potting and Repotting
Choose a pot that is 2 inches larger than the size of the root ball. Otherwise, you can grow a medium-sized plant in an 8-10 inches pot.
A smaller pot might choke the plant. And, if the pot is large, it might take a long time for the soil to dry.
Anthurium clarinervium would require repotting once in 2-3 years when its roots are bound.
Also, choose a pot with multiple drainage holes to let out excess water and moisture.
As the plant requires aeration, correct soil temperature, and balanced moisture, consider using terracotta, clay, or ceramic pots.
However, a root-bound Anthurium shows tell-tell signs through yellowing leaves, wilting, and stunted growth.
Further, you might need repotting when the root catch rot and bacterial infection.
Tips for Repotting
- Water the plant a day earlier and repot it. It helps make the process easier, making the root system more resilient.
- Layer the pot’s base with gravel and fill in the new potting mix. Try using a similar kind of potting mix as earlier to prevent street.
- Now, place the plant in the pot. Ensure you place the rootball at the same depth as in the earlier pot.
- Then, fill the pot with soil until it brim. Leave some space at the top to add fertilizer in the coming days.
- Water the plant thoroughly and leave it in a well-lit space.
All About Growth: Anthurium Clarinervium
Anthurium clarinervium produces a new leaf only in a frequency of 3 to 4 weeks in the growing season.
Similarly, it can reach a height of 15-20 inches. Similarly, its spread is about 15-40 inches in an enclosed environment.
A mature Anthurium clarinervium produces spadix with pale green and violet hues but not in every blooming season.
Similarly, the plant produces berries when the flowers are pollinated. But, pollinating Anthurium clarinervium might be challenging if you have only one plant.
Propagation Methods of Anthurium clarinervium
The best time to propagate them is in early spring or summer when the plant grows actively.
Here are two ways to propagate Anthurium clarinervium.
- Rootball Division
- Stem cuttings
A. Propagation via Rootball Division
The propagation becomes easier as the new plant obtained by rootball division possesses well-developed roots and shoots.
- Moisten the soil a day before propagating the plant.
- Loosen the top 1/3 part of the soil. Afterward, remove the plant from the pot, gripping its stem base, untangle all the roots, and remove the soil.
- Once you find the offsets emerging from the side of the mother plant, slowly separate them from the main rootball.
- Fetch a clean container and layer it with pebbles at the bottom. Then, fill 2/3 part of the container with soil. Next, place the newly obtained offset in the pot and fill the pot with soil.
- Water the plant thoroughly and place it in a bright space.
B. Propagation via Stem Cutting
They will likely start rooting and producing new growths after 3-4 weeks.
- Inspect the stem that must be free of pests and disease infestation and cut it 2-4 inches with leaf nodes.
- Now, dust your cuttings with cinnamon powder or an antifungal powder to prevent fungal growth or rot.
- Take a clean pot with suitable drainage holes. Layer the bottom with a few pebbles and fill 2/3 of it with the medium you use.
- Then insert the cuttings and fill the pot with the medium. You can use sphagnum poss, peat moss, LECA, or soil medium.
- If you are propagating them in water, clear the jar or pot and use clean tap water change. Also, change the water every 3-4 days.
For Seed Germination, you might want to go through this.
Toxicity of the Plant
Anthurium clarinervium is toxic to both humans and pets.
Anthurium clarinervium contains calcium oxalates, which cause harm to humans and pets when injected or come in contact.
In humans, it shows symptoms like breathing difficulty, swollen lips and tongue, nausea, vomiting, and a burning sensation in the stomach.
Meanwhile, your pets might show signs of drooling, pawing at the mouth, and vomiting if they inject it.
On the brighter side, the plant does not show severe human symptoms.
However, you will need to seek medical assistance if you inject them.
For pets, you can consult a local veteran or call the ASPCA at (888) 426-4435.
FAQs about Anthurium Clarinervium
1. Why is my Anthurium Clarinervium Turning Brown?
The most prominent reasons Anthurium turns brown include watering issues, pests and diseases infestation, wrong soil pH, and root-bound problems.
2. How to Distinguish Anthurium Clarinervium from Anthurium Crystallinum?
The plant is often mistaken for Anthurium crystallinum.
Anthurium crystallinum has narrow, long, and bright green foliage, whereas clarinervium has wide and dark green foliage.
From Editorial Team
Conclusion!
Keep an eye on your plant to find pests and diseases infestation signs and resolve them in time.
Avoid overwatering to prevent their invasion into the plant. Also, you can use botanical pesticides such as Neem oil.
Happy Planting!