Wheat farming may sound exciting, but it would hardly fare well if you are unfamiliar with planting and harvesting Winter Wheat seeds.
However, the journey to get good Winter Wheat yields does not end here.
This article provides complete Winter Wheat seeds growing guide with handy tips.
Table of Contents Show
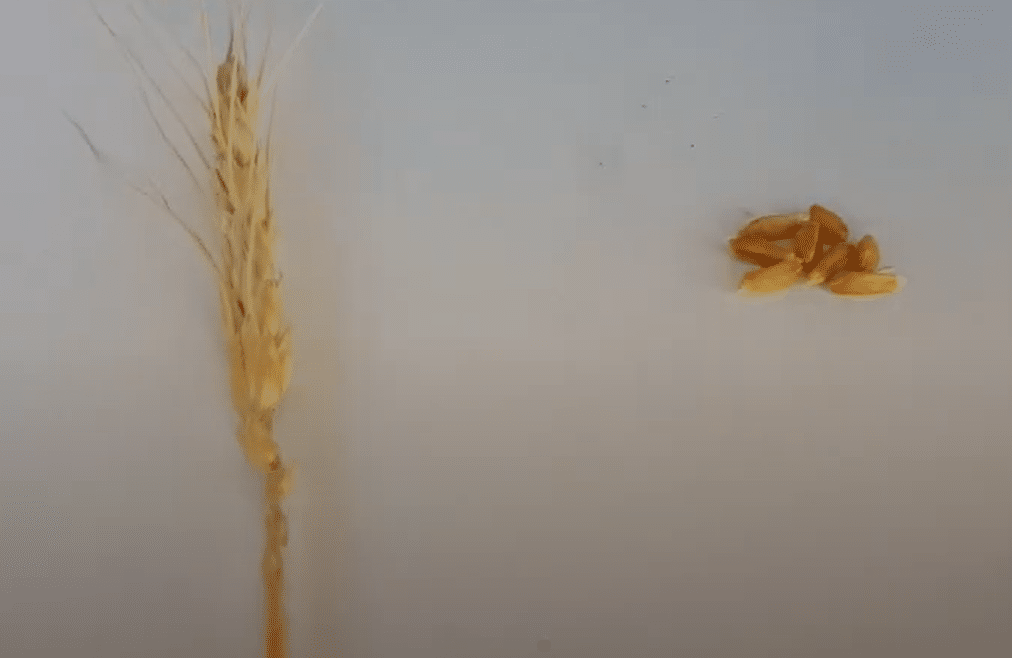
What Do Winter Wheat Seeds Look Like?
Winter wheat (Triticum aestivum) types like Hard Red or Soft Red Winter wheat make a versatile yield with excellent milling and baking abilities.
Growing Winter Wheat seeds can be challenging if you are new to them because the time, condition, and effort required to sow, maintain, and harvest yields should be correct.

However, before discussing ways to grow Winter Wheat seeds, let us examine their characteristics.
| Attributes | Properties |
|---|---|
| Color | Light to dark brown or reddish-brown |
| Size | -Small variety is 1/4 inch (5-6 mm) in length -Large variety is 1/3 inch (6.1–6.9 mm) in length |
| Shape | Oval or elliptical |
| Weight | Around 30-50 mg (0.03 - 0.05 g) per seed |
| Cotyledon | Monocotyledonous (single cotyledon) |
| Harvest Duration | Approximately 110 to 130 days |
| Growing Season | Planted in the fall and harvested in early to mid-summer |
| Germination Time | -3-5 days at temperature of 55-77°F -5-10 days at temperature below 55°F |
| Water Requirement | Adequate moisture during germination and establishment |
| Soil Preference | Well-draining loamy soil with a pH of 6.0 to 7.5 |
| Temperature Tolerance | Tolerates freezing temperatures, but extended periods of extreme cold can damage the seeds |
| Common Varieties | Hard Red Winter, Soft Red Winter, etc. |
| Pest and Disease | Susceptible to pests like aphids and armyworms, and diseases like rust and powdery mildew. |
| Fertilization | Nitrogen is important during vegetative stages |
Remember, choosing the seed type would depend on your region and average minimum temperature.
Hard red Winter Wheat varieties grow well in warm regions throughout the Central Plains, such as Texas, Oklahoma, Colorado, and Nebraska.
On the other hand, soft red Winter Wheat grows well in Missouri, Michigan, New York, etc.
How to Harvest Winter Wheat Seeds?
Harvesting Winter Wheat seeds is the first step in growing sprawling wheat crops.
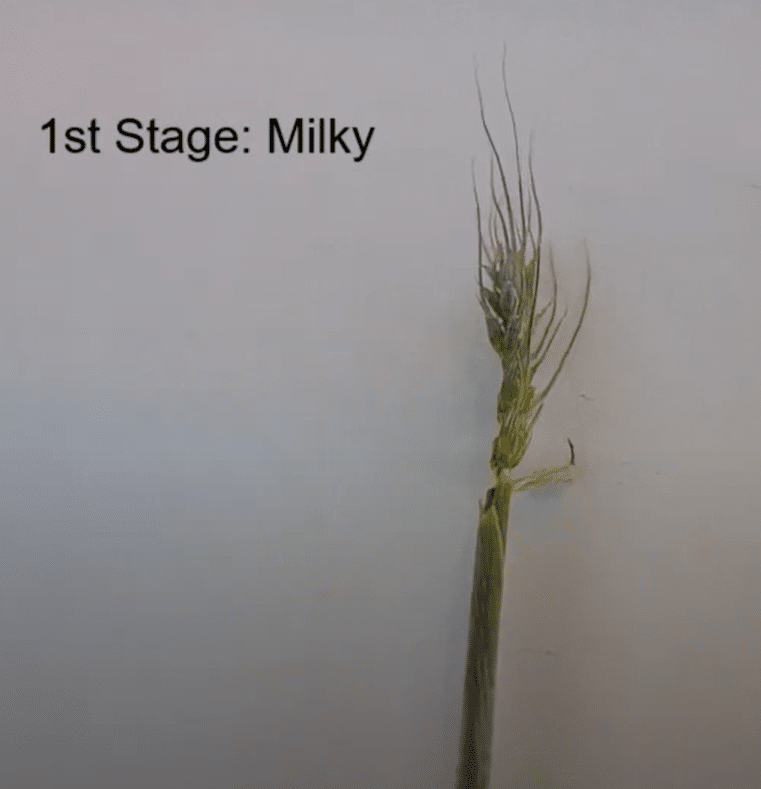
The Winter Wheat should be ready for harvest by summer when the seed heads turn green to brown. There are about 22 seeds per head and 5 heads per plant, making 110 seeds per Winter Wheat plant.
Quick Note: You can wait until the wheat stalk turns golden yellow or brown with no visible green.
Here is how to harvest Winter Wheat seeds for saving.
- Using a sharp cutting tool like Scythe, cut the seed head just above the stalk, unlike the entire stalk, when harvesting for grains.
- However, if you wish to get both grains and seeds, cutting the entire stalk and tying them in a bunch would be best, making a sheaf or bundle.
- Dry the bundle for a week or two and protect it from rain or moisture because only dried kernels produce quality seeds.
- Next, rub the dried kernels between your palms or strike the bunch of stalks on a hard surface to release the seeds.
- Finally, you can measure the seed quality by looking for uniformity, shine, and no traces of mold or diseases.
- Collect and store them in an air-tight Ziploc or bag away from direct sunlight.
Here is an insightful video about harvesting Winter Wheat seeds for saving.
Remember, young seeds would hardly survive the state of dormancy. You can pick Winter Wheat seeds as long as 3-4 years old, only if they are stored in an ideal condition.
Winter Wheat Seeds for Sale
Not every grower would have fresh batches of Winter Wheat seeds available, especially when starting.
Do not be distressed because you can quickly get a fresh batch of high-quality Winter Wheat seeds from the wholesaler or online retailer.
Based on the seller, a single pound of Winter Wheat seeds will cost $7 to $15 or more.
Here is a list of online sellers specializing in various Winter Wheat seeds.
| Shops | Delivery Time |
|---|---|
| Amazon | Offers same-day or 1-2 business days delivery |
| West Coast Seeds | Offers 2-5 business days delivery |
How to Grow Winter Wheat Seeds?
Growing Winter Wheat seeds requires careful planning as the freshly sprouted sapling goes dormant.
Do not worry yet because we have got you covered.
Here is a complete guide to preparing, sowing, and maintaining Winter Wheat seeds.
1. Timing and Location
Winter wheat seeds are cool-season crops; hence, you must sow them within fall, preferably in late August or early September.
Aim to plant the seeds several weeks before the first hard frost in the fall, depending on the regional climate.
For example, the recommended Winter Wheat sowing window in South Dakota is September 10 to October 10.
2. Prepare the Soil
Wheat farming requires loamy soil rich in organic matter and a slightly acidic nature (6.0-7.0).
Clear the planting area of any weeds, rocks, or debris, and perform a soil test using a pH soil test kit.
Add organic matter, including organic compost, to improve soil structure and reduce pH levels. Otherwise, introduce hydrochloric acid, alum, or sodium bisulfate to the soil.
3. Prepare the Seed
Pre-soaking the wheat seeds can yield better results.
Soak the seeds for 24 hours in water or calcium chloride solution, followed by air drying.
Pre-soaking the seeds help break down the hard shell and destroy the anti-nutrients that slow the growth.
4. Sowing the Seeds
Spread the pre-soaked seeds evenly across the prepared soil.
Remember, the recommended seeding rate is 1.5 to 2.5 bushels (90 to 150 lbs.) per acre.
Next, lightly rake the soil to cover the seeds, ensuring the depth is about 1 to 1.5 inches.
5. Watering the Seedlings
The freshly sowed seeds require ample moisture for quick growth, requiring wetting the soil over a foot in depth.
Thoroughly water the newly planted seeds to help them establish contact with the soil.
Winter-grown seeds only require watering once when planted, but ensure to recheck the soil moisture and water if the sapling looks dry or wilted.
6. Provide Winter Care
Winter wheat withstands freezing temperatures during dormancy, but prolonged freeze can inhibit sapling growth.
The wheat seeds can survive temperatures as low as 10°F (-12°C) for short periods.
Snow cover can become a reliable protection against the cold as it provides insulation.
As a solution, you can plant cover crops along the wheat seedling if the snow in your region is unreliable.
7. Evaluate Winter Wheat Condition
You can conduct a bag test to check whether your Winter Wheat saplings are growing or dead, as it is difficult to assume by looking at them.
Assess your wheat saplings between May 15 and 25 for new growth.
- Pick saplings from different parts of the field, revealing the green plant tissue.
- Take 4-6 samples containing up to three inches of soil with visible plant crowns and roots.
- Cut leaves about 1.5 inches above the crown and roots just below the crown.
- Rinse with cool water, lock in a plastic bag, and place in a lit room but direct sunlight.
- After 5-7 days, the sample should have half an inch or more growth.
- If not present, you can assume the plant is dead.
8. Spring Care
- Once spring arrives, the sapling will sprout and grow tall quickly.
- Start with thoroughly watering the saplings to encourage ample soil moisture.
- Cut off surrounding tall plants to allow the sunlight to reach the sapling throughout the day.
9. Fertilization
Young Wheat saplings need a lot of nitrogen and phosphorus pentoxide (P₂O₅) because these two nutrients are relatively immobile in soils.
- Apply 15 to 30 lbs. of Nitrogen and 22 to 225 lbs. of P₂O₅ per acre.
- Use Urea for Nitrogen and formulated phosphorus and potassium fertilizer.
- The single application would be enough if applied a couple of weeks following the new growth in spring.
- Ensure to avoid fertilizing when the ground is frozen, as nutrients may fade away.
10. Pest and Disease Management
Spring and summer will invite various pests like aphids, armyworms and diseases like rust and powdery mildew.
- Implement appropriate pest management strategies if any issues arise.
- At best, you should use resistant Winter Wheat varieties.
- Otherwise, practice crop rotation and avoid using seeds from plants grown in the same ground.
- Check with the seller and only buy branded, pest-resistant, disease-free seeds.
11. Harvesting the Grains
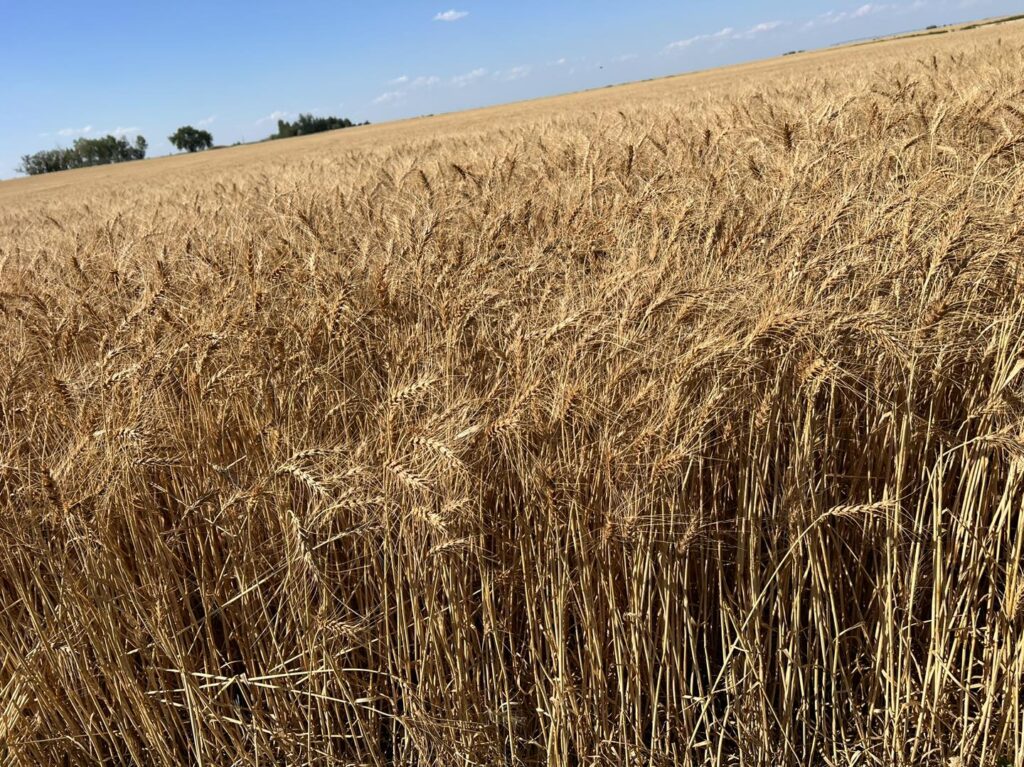
Your Winter Wheat is ready for harvest in early to mid-summer, about 110 to 130 days after sowing.
Wait until the seed heads and stalks turn golden yellow or orange before harvesting.
Otherwise, cut the stalks and let them dry before harvesting grains. You can use a scythe or combine harvester for the same.
Tips to Care for Winter Wheat Seeds
Here are a few beneficial tips to keep your Winter Wheat seeds growing well and yield quality grains and seeds.
- Plant the field border with companion plants like Legumes (clover or vetch) to fix nitrogen in the soil and suppress weed growth.
- Planting seeds near the soil surface can lead to winterkill issues, while deeper seeding can delay emergence. Keep the seed planting depth to 1.5 to 2 inches.
- Beneficial insects Ladybugs, lacewings, and predatory wasps reduce the need for chemical pesticides by killing the pests.
- Creating a mini flower garden along the wheat field invites beneficial insects.
- Choose a resilient wheat cultivar Oahe that is both high yielding (1-2 extra bushels per acre) and disease resistant.
- Sow a winter cover crop like winter rye or barley after harvest to protect the soil from erosion, prevent weed growth, and add organic matter for the next sowing season.
- Practice crop rotation with non-cereal crops like legumes or brassicas to discourage pest, weed, and disease growth.
- Use seed treatments like fungicides and insecticides to protect the seeds from soil-borne diseases like Bipolaris, Fusarium, and Pythium.
- Regularly monitor soil moisture levels in winter and spring using a soil moisture meter.
- Winter Wheat seeds require 18 inches of soil moisture to encourage seedling and root development.
From Editorial Team
Conclusion!
If you are trying to sow Winter Wheat seeds in spring to prevent winterkill, remember to treat them as spring wheat seeds. Clear the field of weeds and adjust fertilizer and fungicide rates accordingly.
Please drop in your comment to let us know how you successfully grew Winter Wheat in spring.

